Signing Your Name and Handwriting
Like many other everyday skills, handwriting belongs in the category of “If you don’t use it, you’ll lose it!” Therefore, to retain the ability to sign your name and use your handwriting to make notes, memory joggers, or grocery lists, it’s essential to keep using your handwriting skills. Many different types of pens, papers, and writing guides can help you continue to write.
General Handwriting Tips and Techniques
If you were able to write when you had vision but haven’t used your handwriting skills since losing your sight, you would likely need to address several key areas: (a) following a straight line or keeping the bases of the letters on the writing line, (b) using the correct amount of space between letters and words, (c) crossing and dotting letters, and (d) correct letter formation.
The sharper the contrast between your writing surface and the words you’re writing, the easier it will be to produce legible handwriting. Black or navy ink on ivory paper is best—bright white paper may cause glare. Also, try placing your paper on a dark-colored surface or desktop to avoid writing off the page.
Here are some hints that can help you use a signature or handwriting guide more effectively:
- When writing with either your right or left hand, use the forefinger of your other (free) hand as a placeholder and guide.
- Your guide finger should not touch the pen except immediately before lifting it from the paper, such as raising it at the end of a word or moving to the following line of writing, for example.
- Move your guide finger to the pen before lifting it at the end of a word. This helps to ensure that there is sufficient space between words and sentences.
- Your guide finger also assists in moving from one line to the next. When you reach the end of the writing line, your guide finger retraces the writing line, drops down to the following line, and is placed at the left margin as a placeholder.
- To keep track of how far down the page you have written, place a paper clip on the left (or right) margin of the current writing line, sliding the paper clip down the page as you move from one line to the next.
- To cross the letter “t” and dot the letters “i” and “j,” complete the letter by returning to the writing line, and then bring your guide finger forward to touch the pen. Leaving your guide finger in place, lift the pen and dot or cross the letter, and then return it to your guide finger.
- Alternatively, dotting and crossing can be accomplished by muscle memory. Cross the “t” and dot the “i” and “j” just before spacing for the next word rather than letter-by-letter.
- Place your little (or “pinky”) fingers in each upper corner to locate the center of a business envelope, spreading the other fingers of each hand equally. Your index fingers will meet near the center of the envelope. Mark the center with a paper clip at the top of the envelope; begin writing even with the paper clip.
- The center of many envelopes can also be determined by locating the point of the envelope flap.
Handwriting Supplies and Adaptations
First, it’s helpful to understand the different types and categories of signature and handwriting guides:
- Rigid Guides: The line spaces for writing are outlined by rectangular, cut-out spaces. These guides can be made of plastic, cardboard, or metal. They can help you stay within the writing space, but they do not allow you to make letters that descend below the writing line, such as “g” or “y.”
- Flexible Guides: Use an elastic or flexible baseline material to make letters descending below the writing line, such as “g” or “y.” These guides usually require a bit more skill than most rigid guides.
- Bold Line Guides: Use paper tablets with darker, denser, or wider lines rather than regular lined writing paper. Bold line paper can be helpful if you have low vision.
Writing Pens
You can purchase writing pens at local office supply stores and through specialty catalogs. They are available in various styles, including Bic, 20/20, felt tip, Barole, Sharpie, and Marvy Marker.
Some markers have a distinct smell, and others require cardboard backing under the writing paper to prevent your writing from “bleeding through” the paper.
If you choose a larger-tip writing pen, you must form larger letters so that you (or the recipient of your message) can read your letters and words more easily.
To find the pen that works best for you, try experimenting with several different brands and tip thicknesses until you find one that best meets your writing needs.
Signing Your Name
You can use a commercial signature guide approximately the size of a credit card, made of plastic, and has a rectangular cutout in the middle. This type of signature guide is available in rigid and flexible versions.
Signature Guides
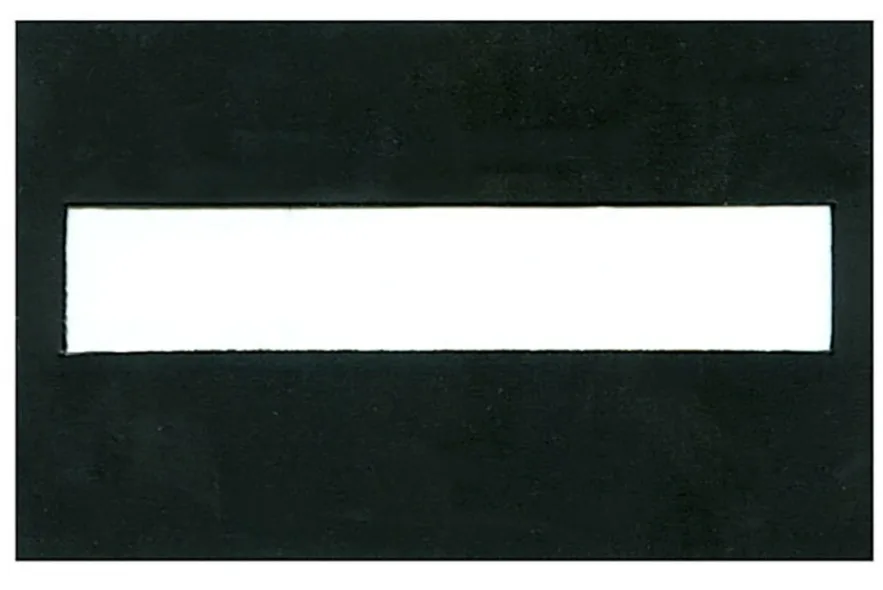 signature guide
A friend, family member, or store clerk can line up the signature guide with the writing line, allowing you to sign your name independently in the writing space. If you have low vision, this type of signature guide is usually black or darker colored and provides good contrast with white or light-colored paper.
Create Your Signature Guide
There are many ways to create your signature guide:
- Ask a family member, friend, or store clerk to make a sharp crease in the paper along the writing space. This will provide a tactile raised writing line to help guide your signature placement.
- Place 2-3 layered “Post-it” notes along the writing line to make it easier to locate and feel. Write your name just above the “Post-its” and remove them when finished.
- Ask a family member, friend, or store clerk to place the upper edge of a credit card just below the writing line. This will provide a raised writing line to help guide your signature placement.
- Use your non-writing hand’s index and middle fingers to form a “V.” Place your hand forming the “V” palm down and sideways on the paper so that your index finger is directly below the entire writing line and your middle finger is angled above the line. Sign your name above your index finger and stay inside the “V” to help guide your signature placement.
- Ask a family member or friend to cut a rectangular opening in either an expired credit or debit card, a facsimile credit card frequently sent with card offers or a piece of cardboard cut to the size of a credit card. The opening should be 1/2″ by approximately 3″. Use this template in the same way you would use a commercial signature guide.
- If you have low vision, ask a family member or friend to use a marker pen and darken the writing line for you. This will make the signature line easier for you to see.
- Please note: Before you sign any important document, ask a trusted friend or family member to read it before you add your signature.
Rubber Stamp
A rubber stamp of your signature can be made for you at most office supply stores. Before you begin to rely solely on a rubber stamp, however, try to maintain your handwritten signature and use a signature guide or bold line paper to help you.
Can I use an “X” as my legal signature?
Yes, but be aware that you can continue to use your unique signature. Banks will recognize your signature as long as it is consistent, regardless of its legibility to you or others.
Writing Paper
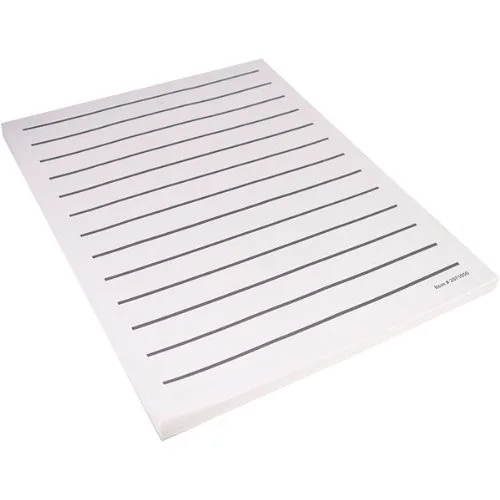 Low Vision Bold Line Writing paper available from Amazon
There are many different types of writing papers to choose from. Some papers have raised lines, some have bold lines, and others have wider spaces between the lines. You can purchase these writing papers at stationery stores and through specialty catalogs.
The writing spaces between lines can range from 1/2″ to 1″. If you need more space between the lines, try using plain white paper and write as large as you need.
You can organize and store plain paper in a three-ring binder. You can use a range of three-ring binders to store papers for different purposes.
You can choose different textures, bold and contrasting colors, patterns, and sizes to differentiate and identify each binder. You can attach a label to each binder in large print, braille, or any other means of tactile or visual identification that works for you. Remember: the choice is always yours.
Commercial Writing Guides
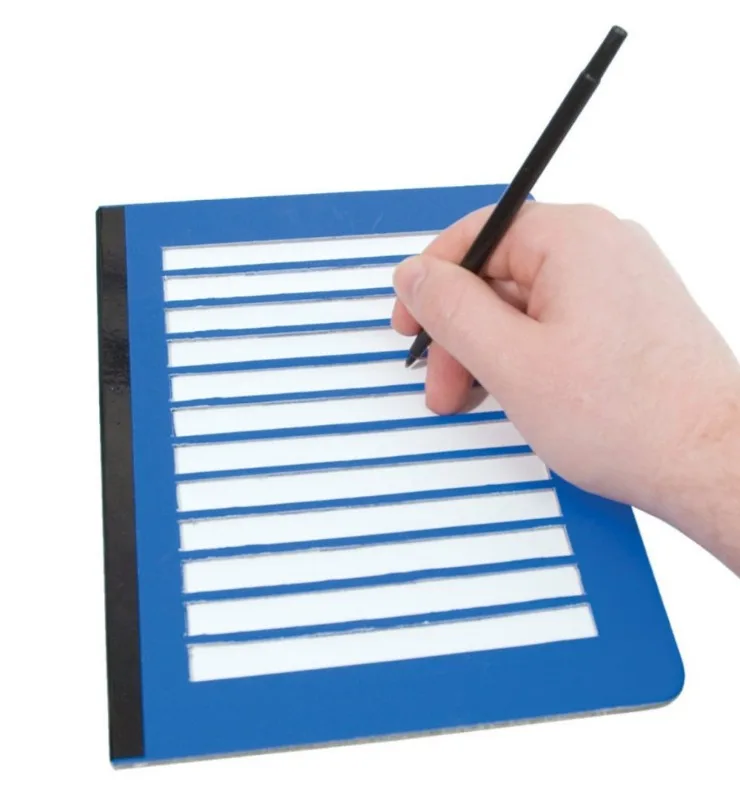 Fold-Over Low Vision Note Writing Frame available from Maxi Aids
Use a commercial full-page writing guide for making lists and writing letters. This type of writing guide is available in sturdy aluminum. The writing guide shown here is a full-page 8 1/2″ x 11″ aluminum overlay sheet with 13 openings that match standard line spacing.
Most writing guides use plain paper and space within the guide frame, providing tactile boundaries for the writing line. Styles range from plastic overlays to clipboard styles that contain a writing board, a clamp to hold the paper, and a movable cursor bar. You can find a variety of rigid and flexible writing guides.
Homemade Writing Guides
You can also create a homemade writing guide by folding the paper to produce raised line paper. Here are two commonly used techniques. (Source and photos: Nancy Paskin, CVRT)
Make Your Own Raised Line Paper
1. Take a plain piece of paper and a pen or pencil.
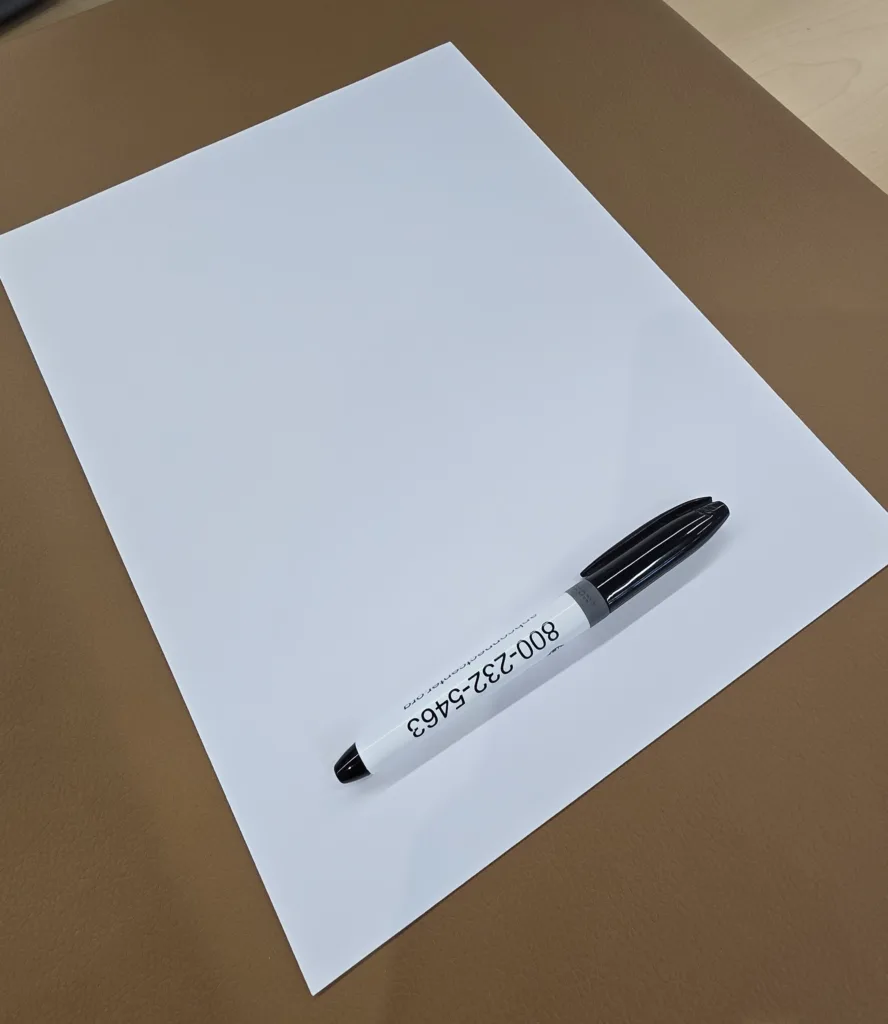
2. Roll it tightly around the pen or pencil.
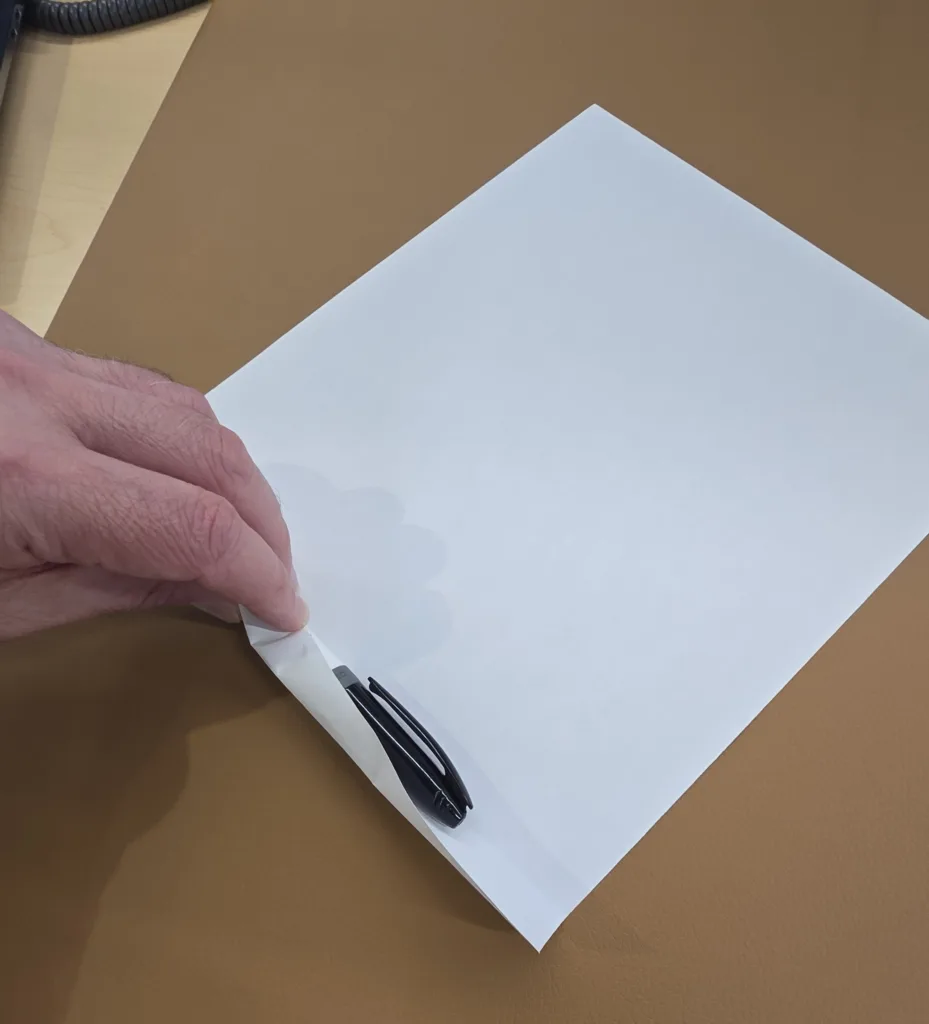
3. Keep rolling until the whole paper forms a paper tube.
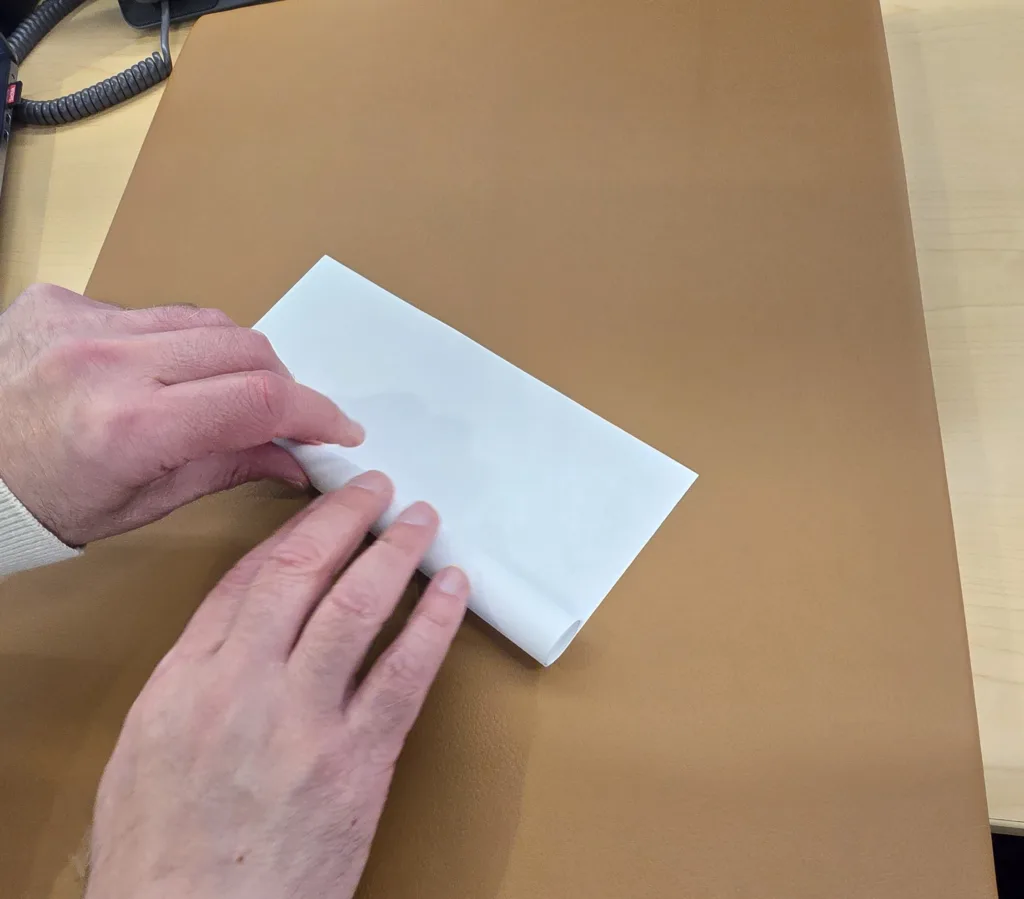
4. Allow the pen/pencil to drop out from the middle of the tube.
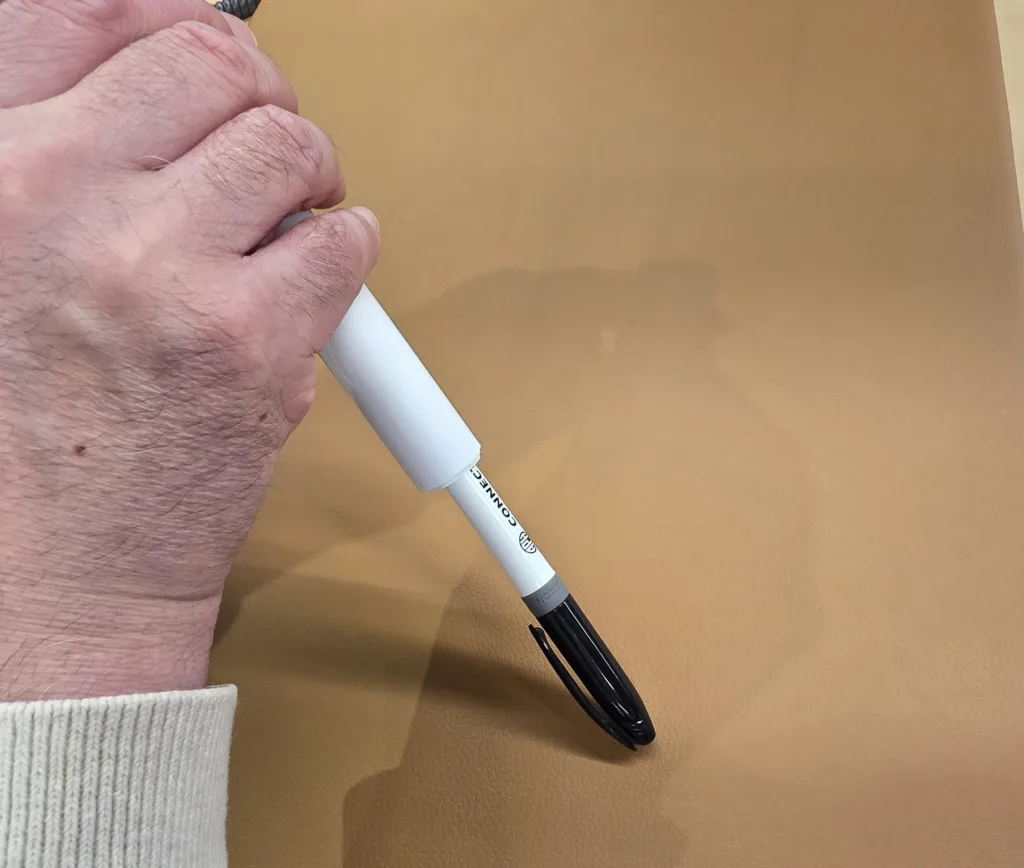
5. Lay the tube on a flat surface and press it flat.
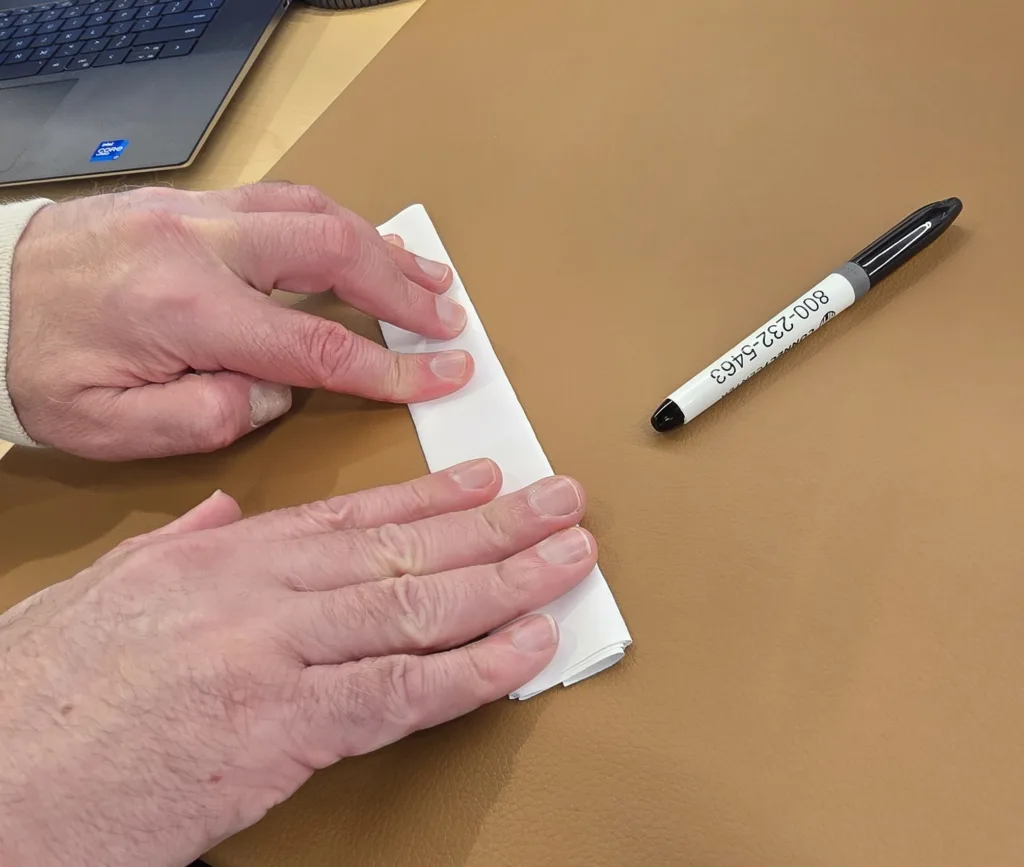
6. Open the tube and lay the paper on the table so that it straightens out, and you can feel the evenly spaced raised ridges.
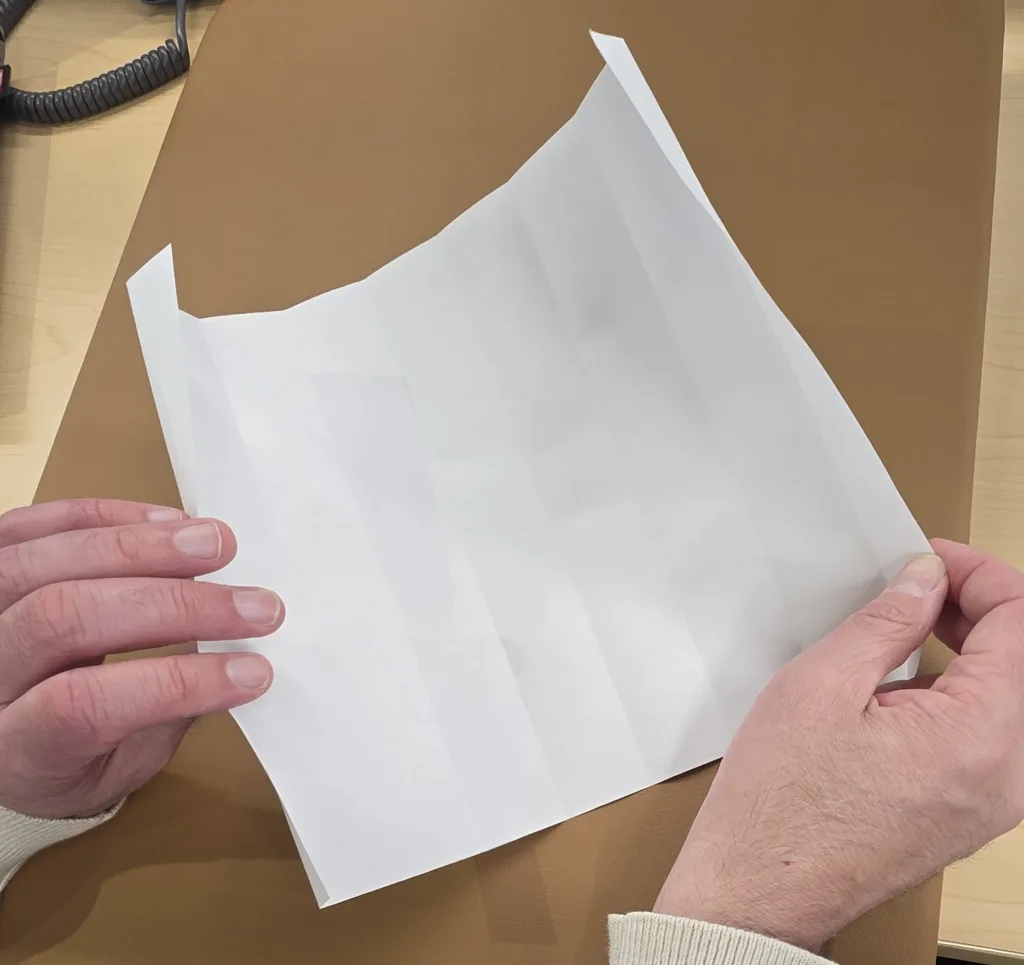
Use these ridges as your writing lines.
Fold and Write as You Go
This is an easy way to make a list or write a note.
1. Take a plain piece of paper and lay it flat on a table. Fold the bottom edge 1 inch or as wide a writing line as you need.
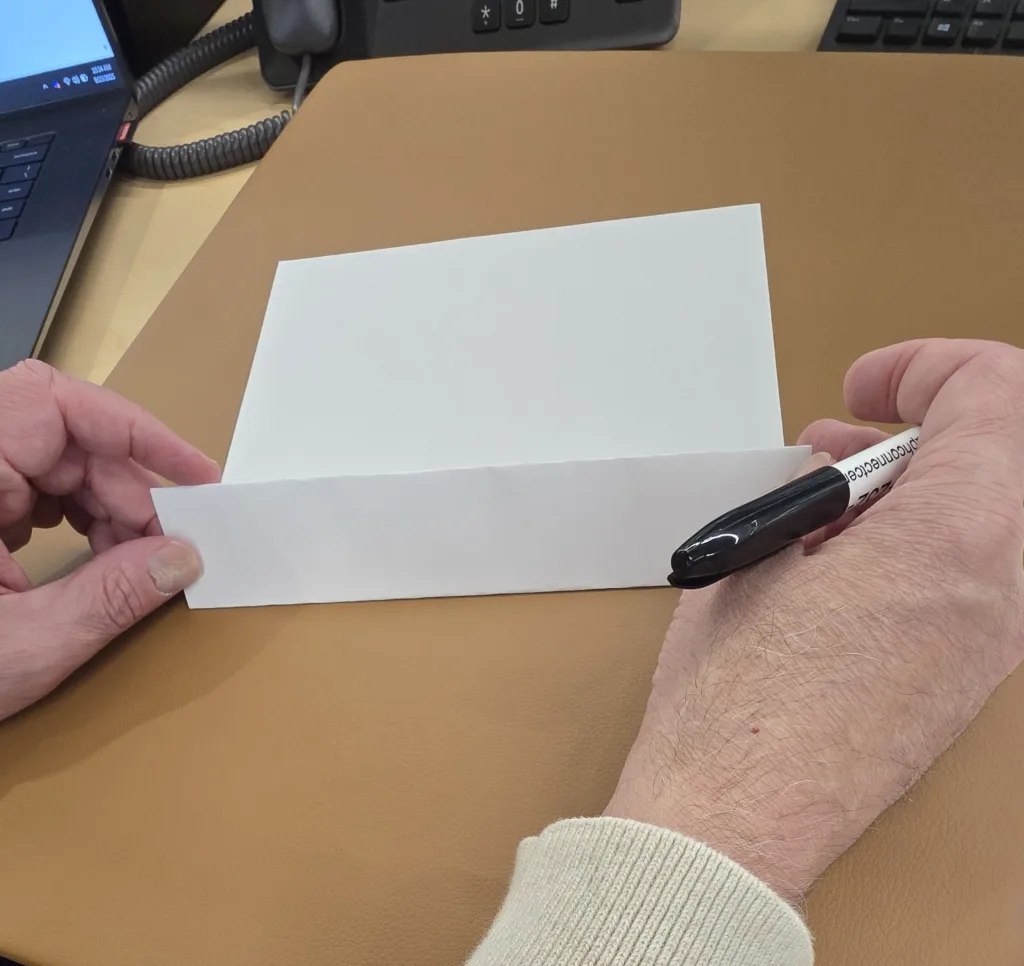
2. Write the first line of your note on the folded edge along the bottom of the paper: “June 26…” etc.
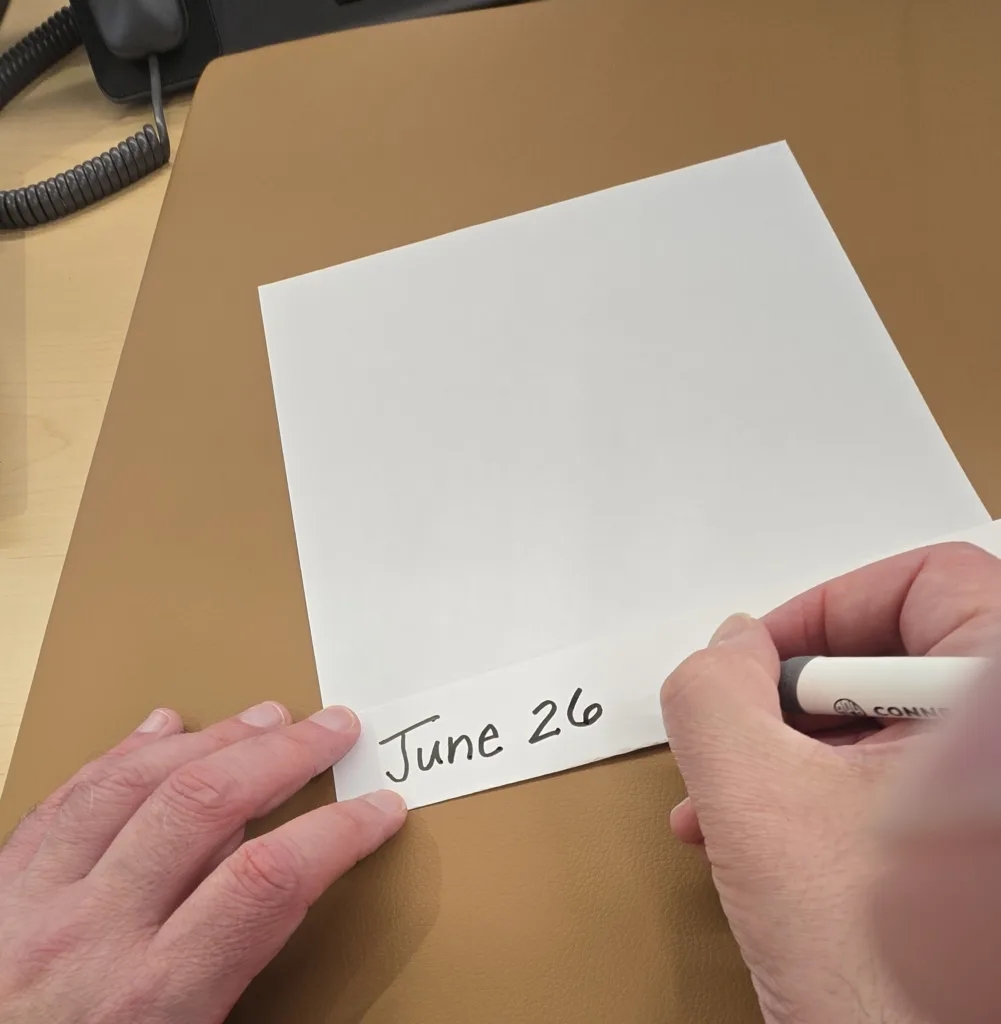
3. Then fold the paper up and over again from the bottom, using the previous writing fold as your guide. This will give you a new, raised writing line.
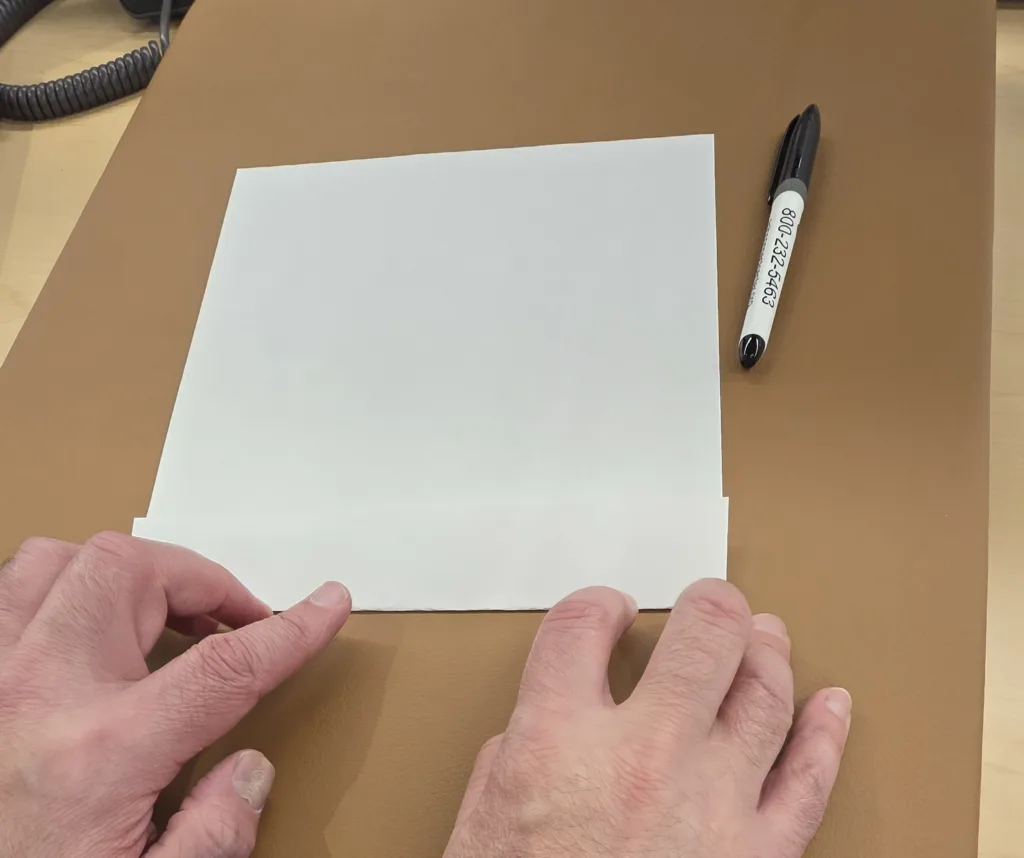
4. Write the next line of your note: “Dear Jane …”
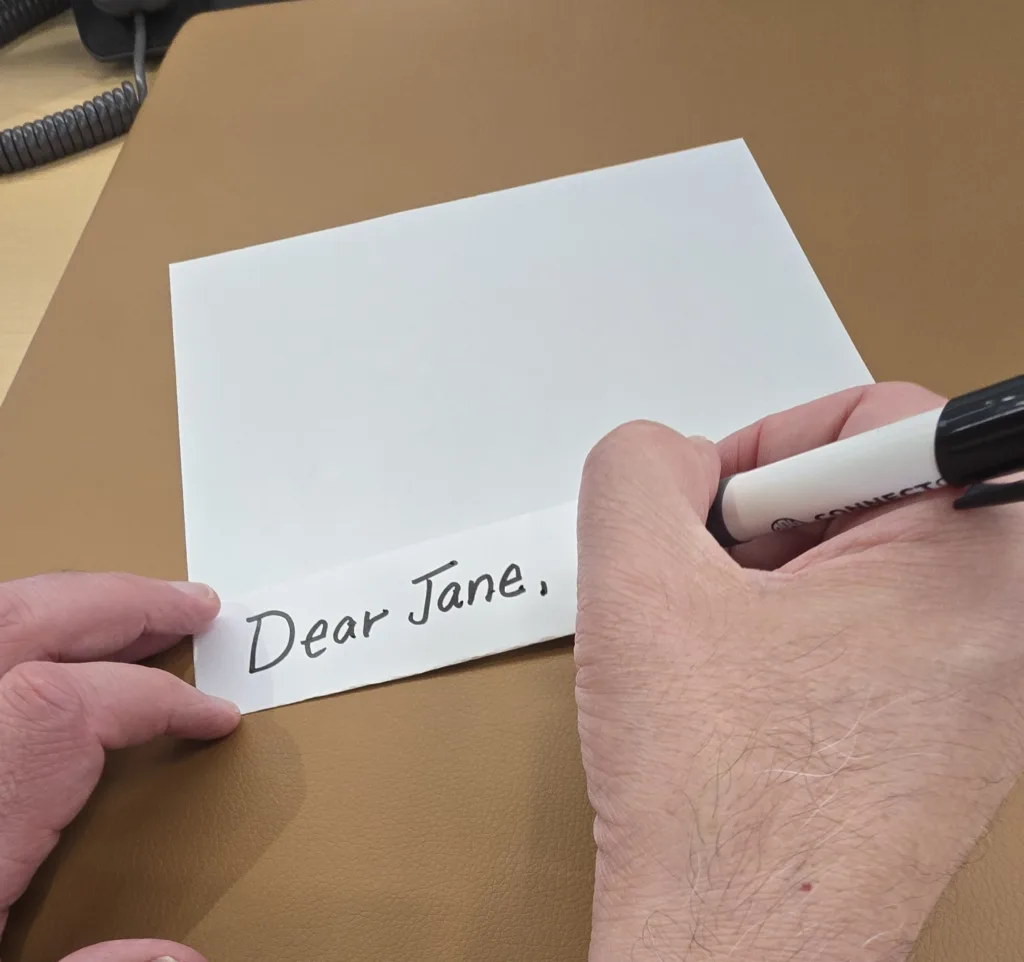
5. Fold the paper repeatedly to create another raised writing line.
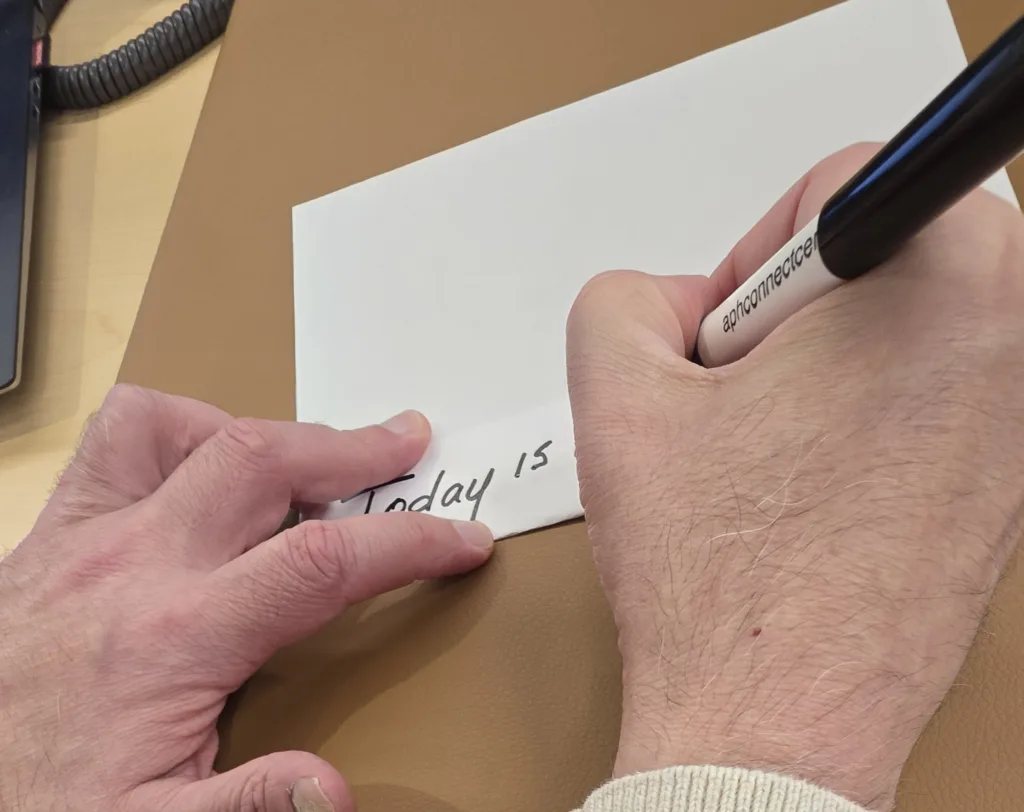
6. Write the next line of your note: “Today is rainy …”
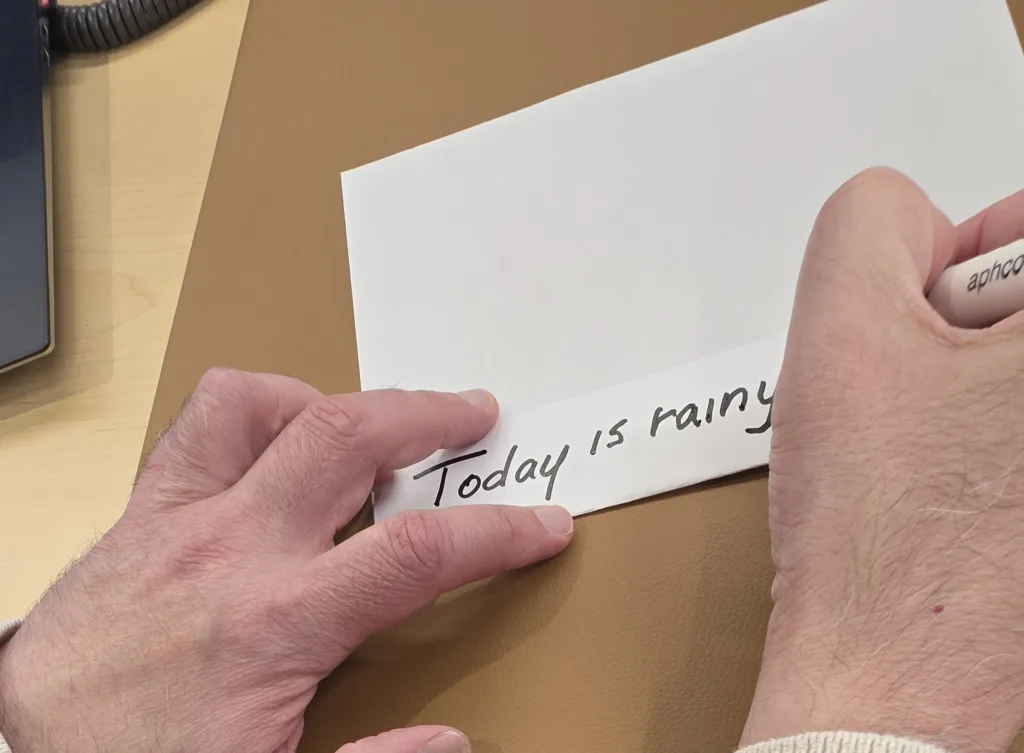
7. Continue folding the paper up from the bottom one line at a time.
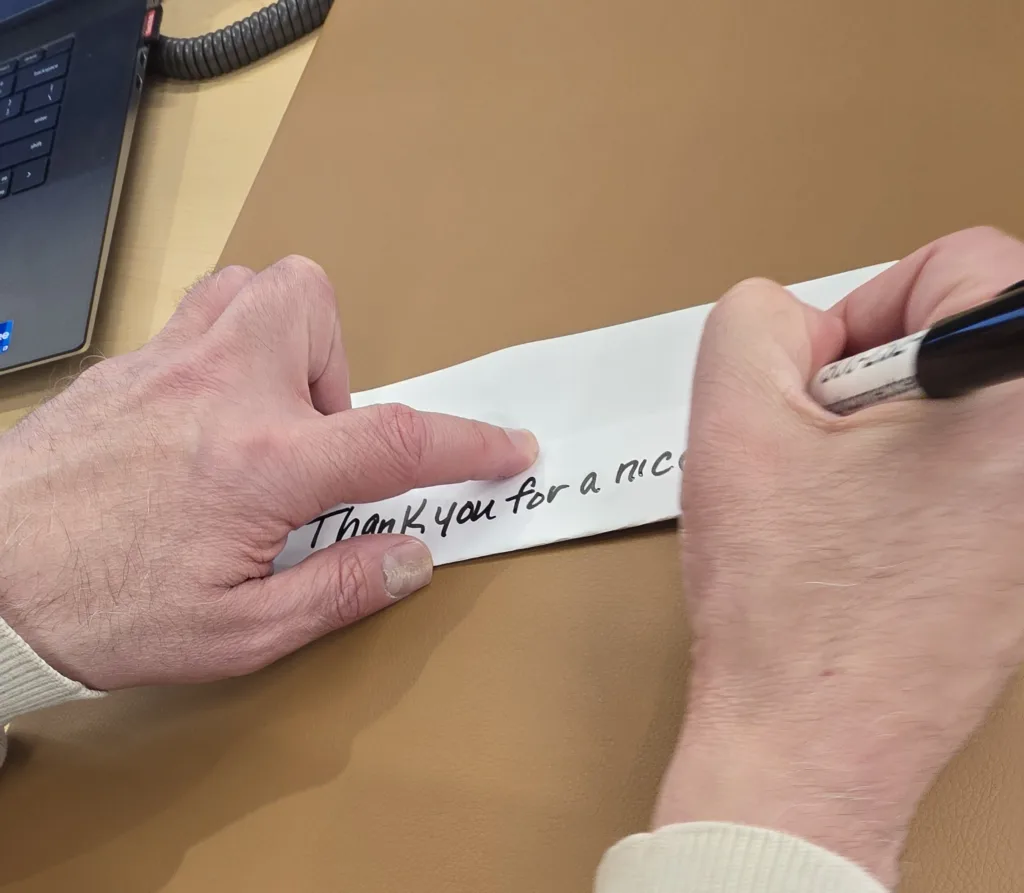
8. And on each new fold, write another line of your note until you have finished: “Tom”
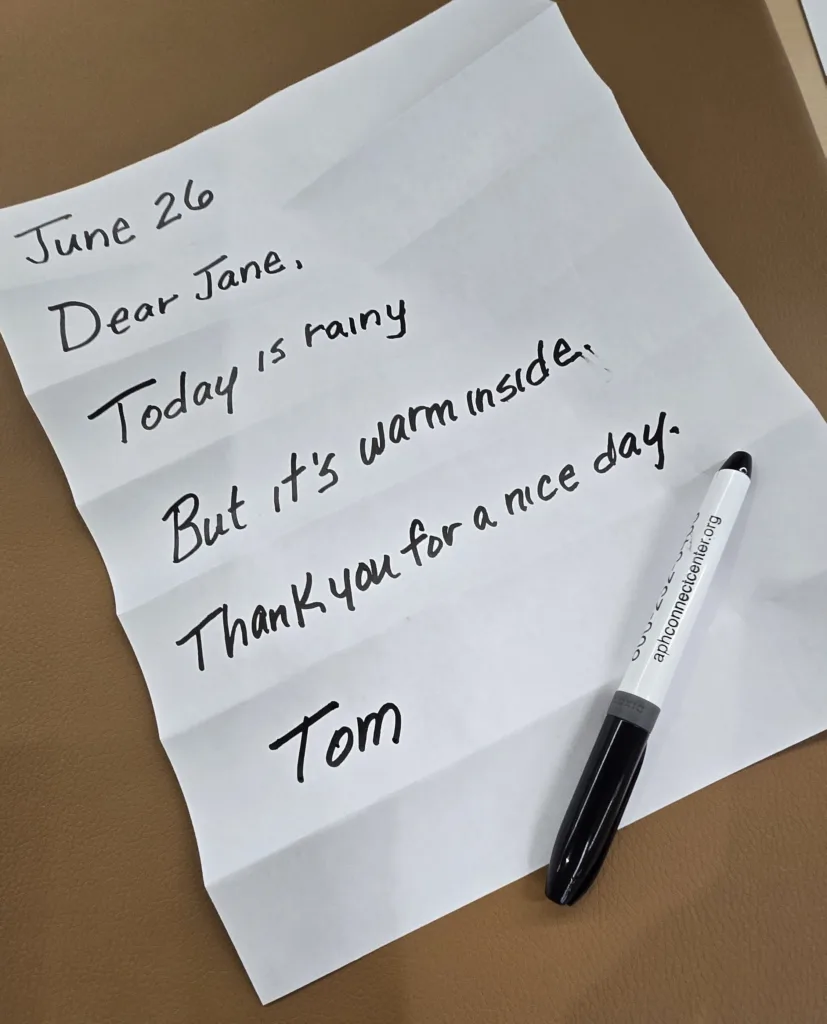
9. When you are done, unfold the paper. Your note will be in order from top to bottom, and the writing will be evenly spaced.