Accessible Gardening for Blind and Low Vision Individuals
This content is also available in:
Español (Spanish)
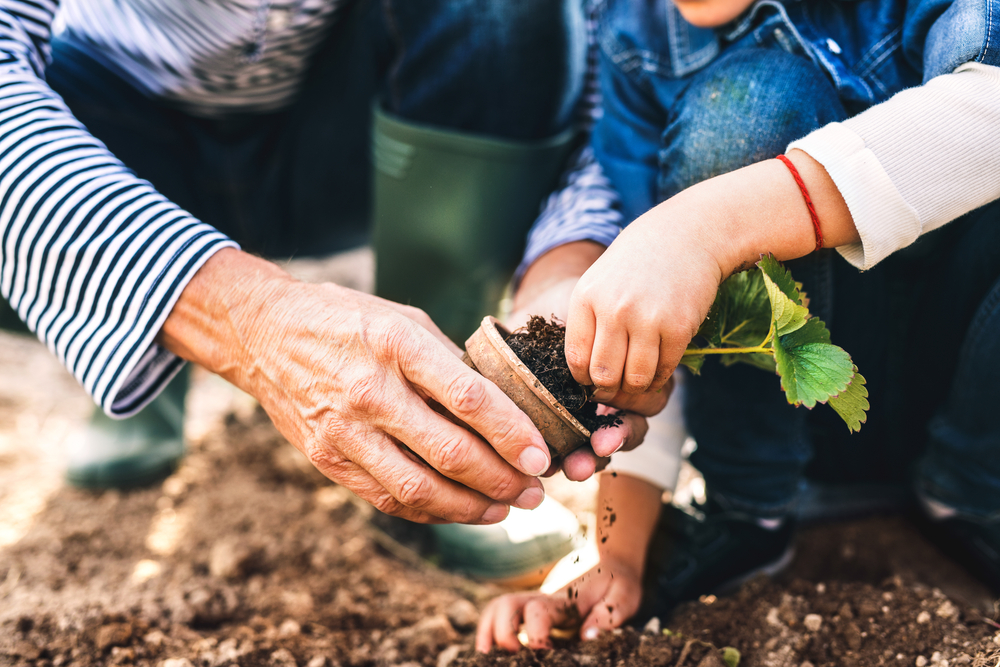
Gardening is a truly rewarding and sensory-rich activity that offers immense joy and connection to nature. Everyone can enjoy it, including those who are blind or have low vision. With thoughtful adaptations and innovative approaches, gardening can remain an accessible, fulfilling, and safe hobby. Whether you are new to cultivating a green space or returning after vision loss, these strategies will help you enjoy the process while making it efficient and immensely satisfying.
Raised Beds and Container Gardening
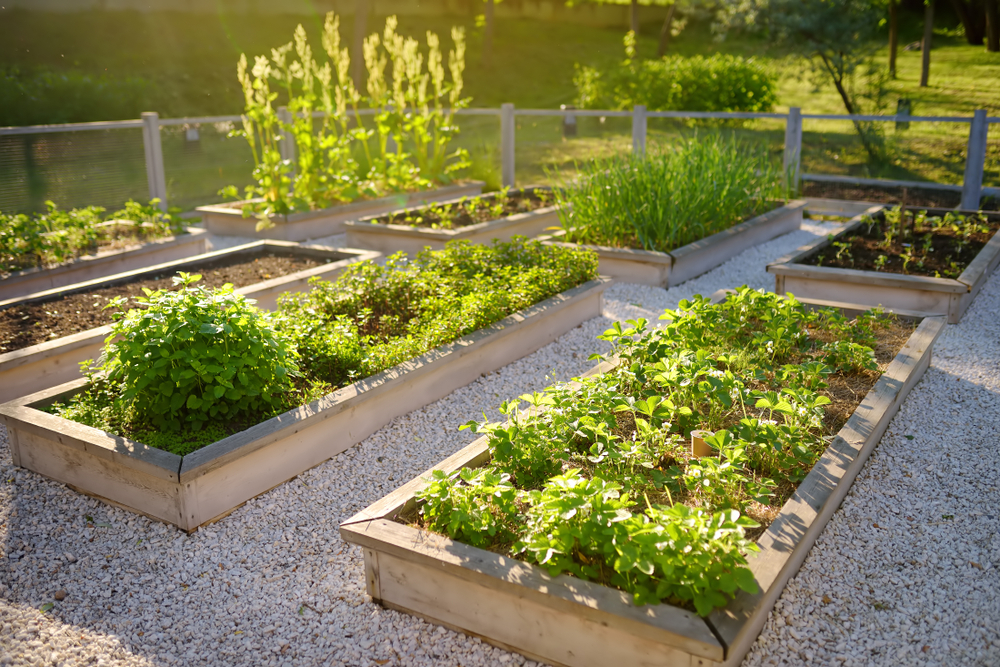
For many blind and low vision gardeners, raised garden beds and container gardening provide significant advantages, making the planting, tending, and harvesting processes more manageable and enjoyable.
The Benefits of Raised Beds
A raised bed garden acts much like a large, bottomless flower box, allowing gardeners to comfortably work from the outer perimeter without needing to step into the bed. This design eliminates the need for extensive tilling and significantly reduces the effort required for weeding, making it an ideal choice for accessible gardening.
Constructing Your Raised Bed:
- Materials: Raised beds are versatile and can be constructed using various materials such as cinder blocks, pre-fabricated wood assembly kits, or simply stacked boards.
- Lining: To prevent weeds from encroaching, line the bottom of your raised bed with cardboard or garden cloth.
- Soil: Fill your new raised bed with a high-quality mix of fresh garden soil and compost. For enhanced moisture retention, consider incorporating coconut coir, an environmentally friendly alternative to traditional peat moss.
Square-foot gardening is a highly efficient, high-intensity method within a raised bed. Different plants are grown in separate 1-by-1-foot squares, maximizing yield even in a compact area.
- Marking Plots: Use twine and screws to easily and tactually mark off your individual planting plots within the raised bed.
- Sowing Seeds: Utilize simple templates to ensure you sow seeds in straight, organized lines, promoting consistent growth and easier identification.
The Advantages of Container Gardening
Container gardening offers unparalleled flexibility, bringing the garden to you. It’s perfect for porches, patios, balconies, or even indoors, and allows you to garden without needing traditional in-ground garden beds.
- Easier Plant Identification: Keeping plants in separate containers can make them easier to identify by touch, smell, or a labeling system.
- No Digging Required: Enjoy gardening without the physical demands of digging or tilling large beds.
- Optimal Growing Conditions: You can now exert more control over soil quality, moisture levels, and sunlight exposure for individual plants.
- Easy Rearrangement: Move plants to optimize their growth based on light conditions or simply to rearrange your space.
Plants That Thrive in Containers
Many popular vegetables, herbs, and flowers flourish in containers.
The following are best suited for large containers (e.g., 5-gallon buckets, large pots):
- Broccoli, cabbage, cauliflower
- Leafy greens (chard, kale, collards)
- Celery, carrots, beets, potatoes
These work well in small containers (e.g., recycled food containers, smaller pots):
- Herbs (parsley, chives, basil, oregano, mint, lemon balm, lavender)
- Leaf lettuces, spinach, and radishes
Many can be started from seeds or small starter plants available at local gardening centers.
Soil Considerations for Container Gardening
The right soil is crucial for healthy container plants.
- High-Quality Soil: Always use high-quality topsoil or potting soil to ensure good drainage and minimize weeds.
- Proper Drainage: Choose containers with adequate drainage holes to prevent water from pooling, which can damage roots. Adding a layer of pebbles or wood chips at the bottom can further improve drainage.
- Moisture Retention: A mix of two-thirds soil and one-third peat moss (or coconut coir) can significantly enhance moisture retention and nutrient content.
Finding Containers on a Budget
You don’t need to purchase expensive containers. Consider recycling common household items:
- Old plastic trash cans (add drainage holes)
- Large food containers (yogurt, cottage cheese, takeout containers)
- Five-gallon buckets from restaurants or hardware stores
- Spackle buckets (cleaned thoroughly)
Enhancing Sensory Engagement and Garden Layout/ Identification
Gardening is a multi-sensory experience that goes beyond sight. You can create a truly immersive garden by engaging touch, smell, and even taste.
Labeling and Identifying Plants
Clear plant identification is key for an organized and enjoyable gardening experience. The best approach will depend on your vision level and personal preference.
- Marker Plants: Utilize plants with distinctive textures, scents, or structures (such as fragrant basil, tall tomatoes, or bushy broccoli) to help identify different areas or contents of a container.
- Tactile and Visual Labels: Use waterproof tape with large print markers or braille labels placed directly on containers or plant stakes.
- Color-Coded Stones: Assign stones of specific colors to different plants (e.g., white stones for daisies, red stones for tomatoes) and place them near the plant.
- Textured Markers: Create tactile cues by tying beads to small craft sticks (e.g., one bead for carrots, two for onions, three for lettuce) or use labeled popsicle sticks.
- Guidance for Rows: Lay down fishing line or use a cane as a tactile guide for planting seeds or seedlings in straight, organized rows.
Cultivating a Sensory Garden
Choosing plants based on texture, scent, and taste can profoundly enrich your gardening journey.
- Aromatic Herbs and Flowers: Incorporate fragrant plants like mint, lavender, lemon balm, scented geraniums, and aromatic roses to fill your garden with delightful smells.
- Textured Plants: Include plants with interesting tactile qualities, such as the fuzzy leaves of lamb’s ear or plants with rough bark, to explore by touch.
- Edible Delights: Grow fresh herbs, vegetables, and fruits for a direct taste-based interaction with your garden’s bounty.
Garden Layout and Accessibility Tips
Thoughtful garden design can significantly improve navigation and ease of access.
- Weed and Water Reduction: Use landscaping fabric or a thick layer of mulch (like wood chips or straw) to suppress weeds and reduce watering frequency.
- Tactile Garden Borders: Use bricks, pavers, crushed stone, or wooden planks to create clear, tactile pathways and borders.
- Raised Beds for Ease: Utilize raised beds to minimize bending and to create clearly defined, contained gardening areas that are easy to reach.
- Visual Contrast: Paint fences, rocks, or plant borders in contrasting colors to enhance visibility for those with some residual vision.
- Contain Sprawlers: Use old tires or raised beds to contain spreading plants like squash or pumpkins, preventing them from sprawling into pathways.
Smart Tools and Essential Safety Measures
The right tools and a safety-conscious approach are vital for an enjoyable and injury-free gardening experience.
Consider the following accessible tools:
- High-Contrast or Tactile Tools: Look for gardening tools with brightly colored handles, or add high-contrast tape or paint to your existing tools for easier visibility and identification.
- Measuring Sticks: Use a long-handled tool with marked measurements (e.g., notches or tactile indicators) to ensure consistent planting depth and spacing.
- Storage Solutions: Keep tools organized and easily accessible using aprons, utility belts, or clearly designated plastic bins. Always return tools to their designated place immediately after use to prevent tripping hazards.
- Protective Eyewear: Always use protective techniques to shield your face and eyes, especially when bending down or working with soil.
Natural Fertilizers and Pest Control
- Organic Solutions: Prioritize natural fertilizers and pest control methods. This will benefit the environment and reduce exposure to harsh chemicals that could irritate skin.
Lawn Mowing and Yard Care When Blind or Low Vision

For those maintaining a lawn, these tips can enhance safety and efficiency:
- Protective Clothing: Always wear long pants, sturdy closed-toe shoes, and safety goggles.
- Remove Obstacles: Before mowing, thoroughly clear the area of toys, rocks, branches, and other debris that could become projectiles.
- Section Off Areas: Use natural landmarks like trees or shrubs, or set up temporary tactile markers, to section off areas and maintain orientation while mowing.
- Power Down: Always turn off the mower completely before attempting to clear any clogs or move objects from the blades.
Additional Accessible Gardening Tips
- Egg Carton Planting Spacer: Cut the bottom out of an egg carton and press it into the soil. The indentations will create perfectly spaced holes for even seed distribution before covering with soil.
- Row Spacing Techniques: In addition to fishing line, use tactile string lines or stakes with tennis balls on top for easy identification and consistent row spacing.
- Portable Gardening Options: For ultimate convenience, grow herbs or frequently used vegetables in large pots or containers near your kitchen door for easy access.
- Community and Resources: Don’t hesitate to join local gardening groups or online forums to connect with other gardeners. Resources like the Hadley Growers group provide guidance and support for gardeners who are blind or low vision.
Conclusion
Gardening is a versatile and deeply satisfying activity that can be adapted for people of all vision levels. By implementing these simple yet effective modifications and embracing the rich sensory aspects of nature, you can cultivate a thriving garden filled with beautiful flowers, aromatic herbs, and delicious vegetables. Whether you choose containers, raised beds, or traditional garden plots, these strategies ensure an accessible and rewarding experience.
If you are an experienced gardener, welcome back to the soil! If you are new to gardening, welcome to a fulfilling, calming, and sensory-rich hobby that offers endless opportunities for growth and connection.
Learn More
This Hadley Helps Blog offers tips and links to resources and workshops on gardening. Learn about tips for gardening, including raised bed gardening, from experienced gardeners who are blind or low vision.