Craft with Confidence: Arts and Crafts Guide for Low Vision & Blind Creators
Engaging in arts and crafts offers a rich sensory experience, an outlet for self-expression, and a wonderful way to connect with others. For individuals who are blind or have low vision, these activities are not only accessible but may improve tactile skills, spatial awareness, and fine motor coordination. This guide offers practical tips for setting up an accessible craft area and provides specific adaptations for popular crafts like beadwork and pottery, empowering you to explore your creative potential.

Creating Your Accessible Craft Haven
To make crafting safe, enjoyable, and independently manageable, it’s essential to start with a well-thought-out space. The tips below will help you create an environment where your creativity can flourish.
Optimal Lighting is Key
Lighting can significantly impact how you interact with your workspace. Consider these strategies to reduce eye strain and maximize visibility or contrast.
• Balance: Most individuals with vision loss benefit from bright environments, but too much light can cause glare. Experiment to find the right balance for your eyes.
• Daylight Crafting: Whenever possible, choose a room with ample natural daylight.
• Strategic Positioning: Position both general room lighting and task-specific lamps to reduce shadows on your workspace.
• Direct Task Lighting: A flexible, adjustable task light focused directly on your work is crucial. Consider a head torch for hands-free, targeted illumination.
• Colored Bulbs: Explore LED bulbs with adjustable color temperatures (e.g., daylight and warm white) to find what works best for you.
Organization is Paramount
A thoughtfully organized craft area supports independence, reduces frustration, and helps maintain focus. These tips will help you streamline your space and workflow.
• Pre-Organization: Always organize your materials before starting a project. This prevents muddling and ensures you can easily locate what you need.
• Workspace Layout: Take time to lay out all materials in a consistent, logical manner. The “clock face” technique, arranging items as if on a clock, can be incredibly helpful for finding different tools and supplies.
• Tactile Identification: Get familiar with the feel of each item. Use elastic bands, bumpons, or blue tack as raised tactile markers for identification. Group small items in separate, clearly labeled dishes or containers.
• Non-Reflective Surfaces: Work on a non-reflective surface, such as a matte craft mat or a tray with sides, to minimize glare and prevent small items from rolling away.
• Return to Place: Develop the habit of returning each item to its designated spot immediately after use.
Sensory Enhancements and Adaptations
Crafting can be a rich multi-sensory experience when you adapt tools and materials to engage touch, sound, and smell. Explore the ideas below to make your projects more accessible and enjoyable.
• Tactile Materials: Incorporate a variety of textures: foam shapes, felt, string, textured paper, sandpaper, and fabric swatches.
• Scented Elements: Use scented markers, essential oils on materials, or even scented clay to create a multi-sensory experience.
• Auditory Cues: Some tools or processes can offer auditory feedback, which can be helpful.
• High Contrast: Use contrasting colors for materials and backgrounds (e.g., black paper with white paint, light-colored boards).
• Tactile Boundaries: For activities like coloring, outline areas with bold markers, dimensional lines (glue, puffy paint, Wikki Stix), or even string for tactile feedback.
• Verbal Instructions & Modeling: Request clear verbal directions for every step. Ask for concepts to be modeled through hand-under-hand guidance or by physically demonstrating techniques.
• Braille and Large Print Labels: Label tools, containers, and glazes with large print or braille.
• Assistive Technology: Utilize magnifiers (handheld or clamp-on), low vision devices (monoculars), and apps like Seeing AI for reading labels or detecting colors. Some adaptive art tools—like tactile rulers, talking tape measures, or rotary cutters with guards—can also enhance precision and safety.
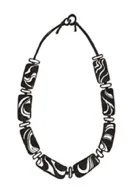
Exploring Creative Outlets: Beadwork
Beadwork is a wonderfully tactile and rewarding craft that allows for intricate designs and personal expression. Consider the following when selecting beads.
Bead Selection
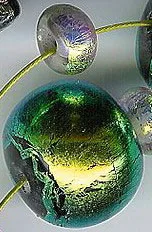
Choosing the right beads is essential for ease of use and tactile enjoyment. Here are some features to consider when selecting your materials.
• Size Matters: Opt for larger beads with wider holes, making them easier to handle and thread.
• Tactile Variety: Explore beads with different shapes, textures, and even braille markings for added sensory interest and personalization.
• Material Exploration: Experiment with various bead materials like glass, wood, plastic, or stone, each offering a unique feel.
Threading Techniques
Threading beads can be made simpler with a few helpful tools and techniques. Try the ideas below to improve control and efficiency.
• Sturdy Threads: Use pipe cleaners twisted together or thick cord for a sturdier threading medium.
• Needle Adaptations: Longer, easier-to-thread beading needles can be beneficial.
• Stopper Knots: Tie a knot at one end of the string or add a cardboard circle or plastic lid with a hole as a stopper to prevent beads from sliding off.
• Taped Ends: Wrap tape around the end of your thread or pipe cleaner to create a firm point for easier threading.
Organization and Safety
A tidy workspace not only boosts productivity but also prevents accidents and lost materials. Use these tips to keep your beadwork both fun and safe.
• Trays with Sides: Always work in a tray with raised sides to contain beads and prevent them from scattering. A washcloth or flannel square on the table can also help prevent beads from rolling.
• Sorting: Group beads by color, shape, and size in separate dishes, muffin tins, or containers that are consistently placed.
• Memory Wire: Consider using memory wire for bracelets and necklaces, as it holds its coiled shape and requires less precise tying. Be sure to use appropriate tools for cutting memory wire.
• Safety: For very small beads, adult supervision is recommended, especially with children, to prevent choking hazards.
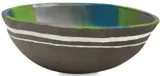
Shaping Creativity: Pottery and Ceramics
Working with clay is an inherently tactile art form that utilizes the sense of touch to its fullest, making it an excellent choice for individuals with vision loss. Whether you’re sculpting, molding, or glazing, the following ideas will help you adapt and thrive in this art form.
Tactile Exploration and Visualization
Before beginning your pottery project, it’s helpful to explore and imagine shapes and textures through touch. These strategies will support creative planning and inspiration.
• Hands-On Learning: Begin by tactually exploring various styles of pottery. Feel the differences in wall thickness between coiled, thrown, and pinched pots.
• Visual Memory: If you have some residual vision, practice using your visual memory to recall and recreate mental images of objects, then translate them into clay.
• Focus on Form and Texture: Concentrate on the overall shape, form, and texture of your pieces rather than relying on fine visual details. Incorporate tactile accents like seeds, beads, or shells.
Working with Clay
Handling clay can be adapted in many ways to support comfort and control. Here are a few suggestions to help you find the best fit for your needs.
• Smaller Amounts: Start with smaller amounts of clay for easier molding and control.
• Clay Types: Experiment with different types of clay, including self-hardening or low-temperature clays like Sculpey or Fimo, which can be baked in a standard oven.
• Color Contrast: Some colored or natural resource clays may provide better color contrast than traditional grey clay if you have low vision.
Glazing Considerations
While glazing is often seen as a visual process, it can also offer tactile and sensory experiences. The following tips will help you explore glazing in a more accessible way.
• Texture Over Color: While glazes can be visually appealing, focus on the tactile textures they create, from glossy to matte, or special effects like cratered or crawling glazes.
• Labeling: Label glazes with large print or braille for identification.
• Measuring: Use contrasting colored measuring devices or those marked in large print for precise glaze formulas.
• Sensory Cues: If possible, consider adding scents to glazes before firing to provide an additional sensory dimension.
General Tips for All Crafts
No matter which craft you pursue, a few universal strategies can boost your success and satisfaction. Keep these principles in mind as you begin or expand your creative journey.
• Community and Instruction: Look for local craft groups or classes that are welcoming and adaptable.
• Online Resources: Seek out tutorials in large print, audio versions, or those with clear, descriptive verbal instructions.
• Patience and Practice: As with any new skill, patience and consistent practice are key to developing confidence and proficiency.
• Embrace the Sensory Journey: Allow your sense of touch and other senses to guide your creative process. The beauty of these crafts often lies in their tactile and multi-sensory nature.
By implementing these strategies and embracing the unique ways you can interact with art, crafting can become a deeply enriching and accessible part of your life. Whether it’s the satisfying feel of beads coming together or the transformative experience of shaping clay, the world of arts and crafts offers endless possibilities for expression and enjoyment.
Learn More