Sewing with Confidence: A How-To Guide for Blind and Low Vision Crafters
Navigating a new or returning hobby can feel challenging after vision loss, but with patience and the right techniques, you can confidently return to needlepoint, quilting, and knitting. This guide empowers you to use your sense of touch and other non-visual cues to create beautiful, rewarding projects.
Getting Started and Organizing Your Workspace
Before you begin, create a space that supports your creativity and allows you to work without interruption. Use these tips to streamline your sewing process and get organized.
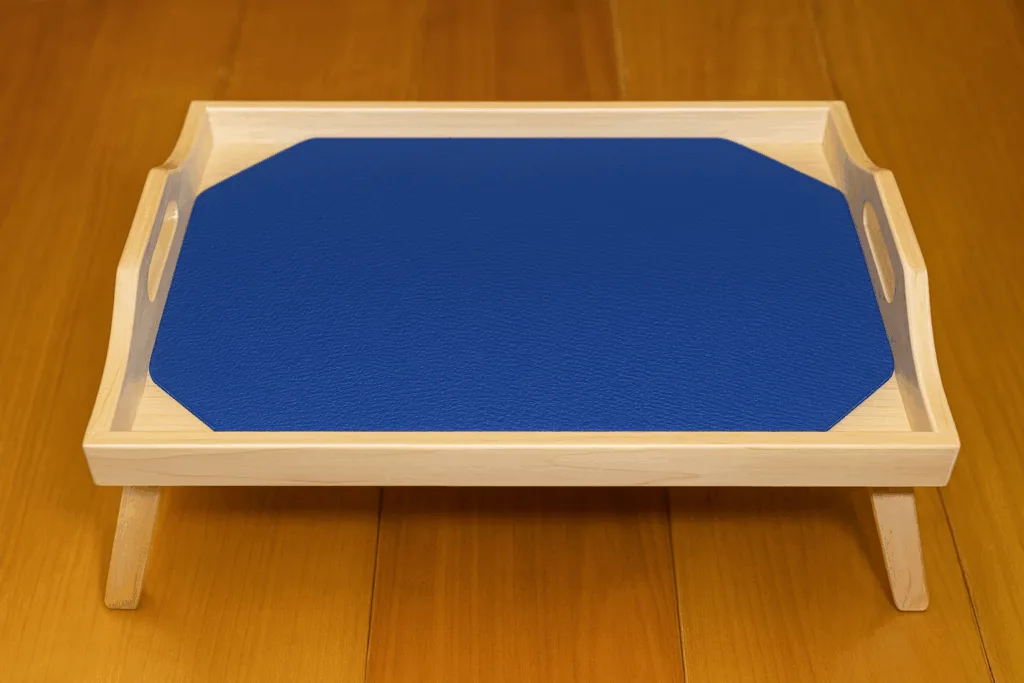
- Create an Organized Workspace: Use a tray with a raised edge to keep materials from rolling away. A rubberized mat or jar opener provides extra grip and stability.
- Control Your Lighting: If you have low vision, proper lighting is essential. A lamp with a flexible gooseneck is usually a good choice because you can adjust the light’s direction as needed. Some lamps also have built-in magnifiers. A good light source reduces strain and helps you see your work more clearly.
- Use Low-Vision Devices: Talk to your eye doctor or a low-vision specialist about devices that keep your hands free. A chest or around-the-neck magnifier, or one mounted on a flexible stand, can be helpful.
- Maximize Contrast: Use a contrasting background, like a light or dark cloth on your lap, to help you see and locate your work. You can also create contrasting work areas with light and dark placemats or non-skid shelf liners.
- Store and Label Supplies: Keep each project’s materials—including threads, needles, and patterns—in a single bag or container to stay organized. Separate your yarns and threads into resealable bags and label them with large print or braille. Use a wide-tipped felt marker for easy-to-read abbreviations or tactile markings. You can store thread and matching bobbins in labeled Ziploc bags or baby food jars to keep your colors organized.
- Keep Pins Handy and Safe: Use two pincushions—one on your wrist and one on your work surface—for easy access. A magnetic pincushion or a refrigerator magnet helps you quickly collect pins and needles, preventing them from scattering. Avoid sewing barefoot or in thin socks to protect your feet from fallen pins.
- Manage Your Thread: Ask the store clerk to release the thread end on new spools to prevent tangles. Use a thread lock, a small plastic disc that snaps into the spool hole, to secure the end.
- Secure Your Scissors: Keep your scissors on a chain or ribbon around your neck so they’re always within reach.
General Sewing and Needle Threading Techniques
If you love the idea of hand-sewing but find needle threading a challenge, modern tools and techniques can help you master the skill and enjoy this rewarding hobby. You can even start with pre-threaded needles for a quick start.
- Prevent Thread Breakage: Coat your thread with beeswax to strengthen it and prevent splitting.
- Choose the Right Threading Tool: There are many options, from pre-threaded needles to specific devices designed to make threading easier.
Mastering the Self-Threading Needle
A self-threading needle is an all-purpose needle with a small, V-shaped slot above the eye. To thread it, you simply pull the thread down into the slot. These needles are inexpensive, easy to find, and familiar to many hand-sewers. The primary disadvantages are that the thread can un-thread with too much force, fraying can occur during threading, and you must stabilize the needle.
Step-by-Step Threading Guide
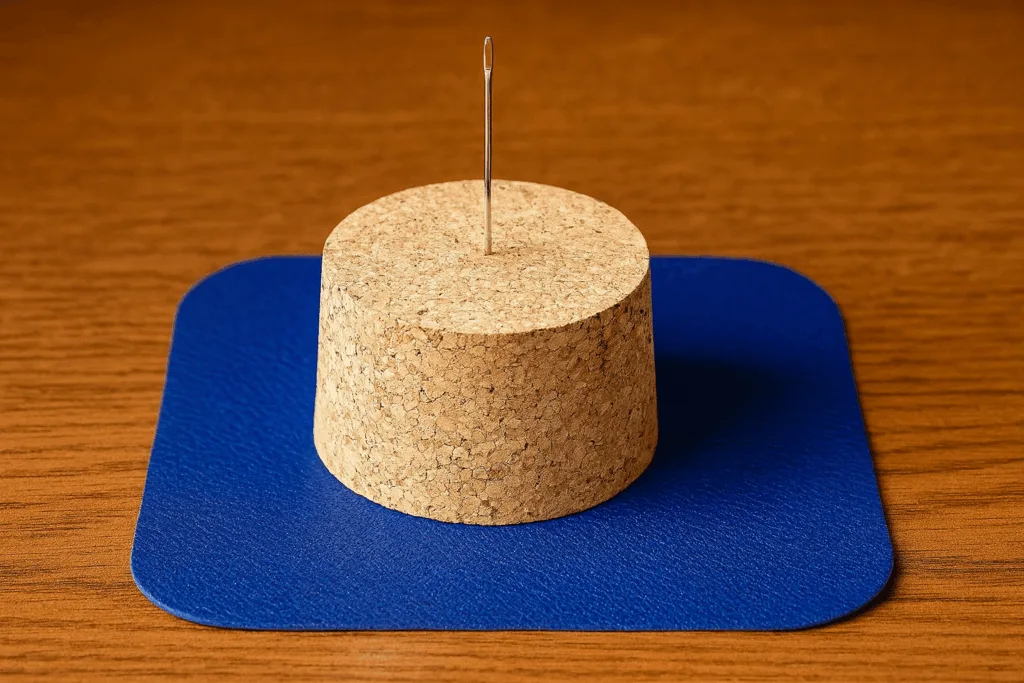
- Prepare Your Materials: Gather a self-threading needle, thread, pincushion, a stabilizer (like a cork or bar of soap), and scissors.
- Stabilize the Needle: Push the sharp end of the needle into a cork or bar of soap.
- Hold the Thread Taut: Grasp the thread with your thumb and index fingers on both hands, leaving a short length taut between them. Keep the thread connected to the spool.
- Align the Thread: Guide the taut thread to the top of the needle with one of your index fingers.
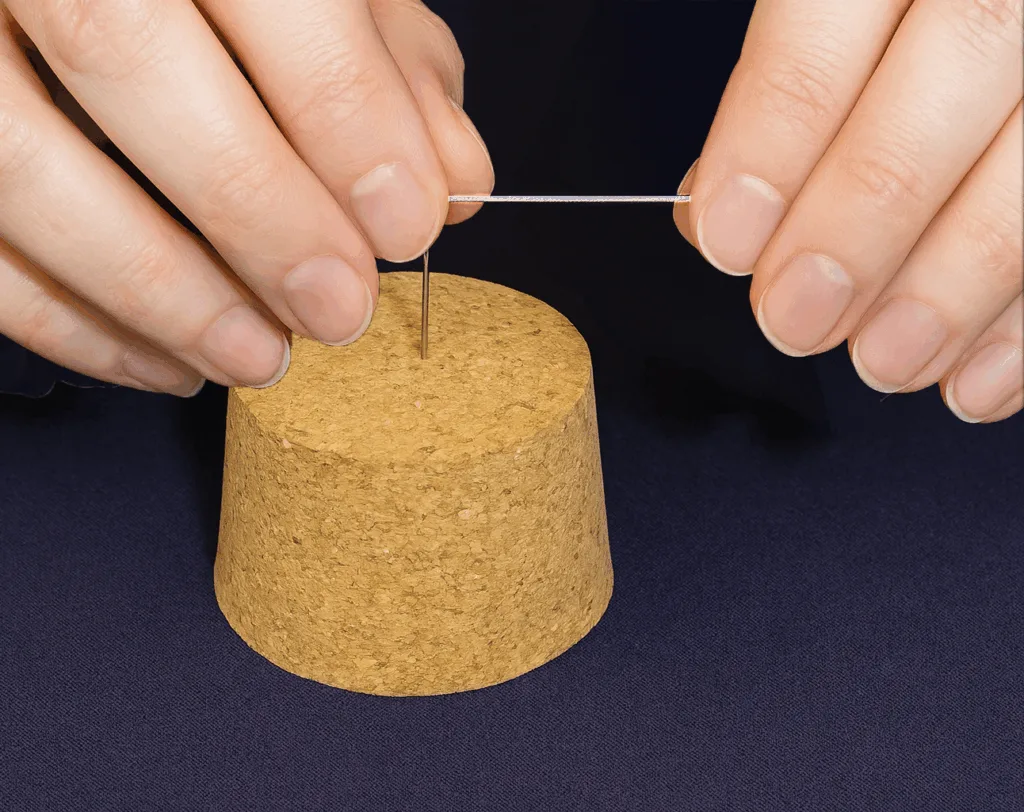
- Press and Lock: Lay the thread across the V-shaped slot. Apply downward pressure to push the thread through the notch and into the eye.
- Listen for the Click: Continue pushing firmly until you hear or feel a “click” or “shift” as the thread locks into place. Stop pushing to avoid breaking the thread.
- Test the Thread: Gently lift the thread to feel for resistance, which confirms it’s securely in the needle’s eye.
- Finish Up: Cut the thread from the spool and tie a knot.
Threading with the “Witch” Needle Threader
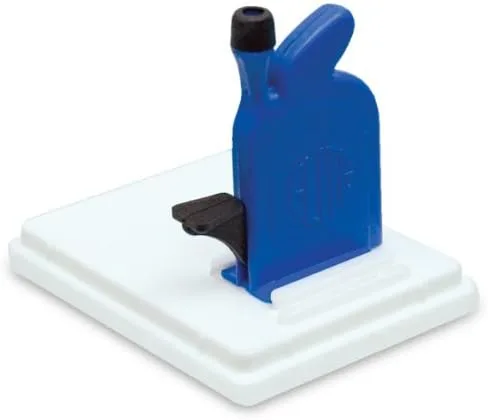
The Hexe, or “Witch,” is a small, brightly colored plastic device that holds a needle and pushes the thread through its eye. It is inexpensive, offers good color contrast, and includes a built-in spool holder and thread cutter. This tool requires good dexterity, can be hard to find in stores, and may not work well with very small or large needles.
 Hexe needle threader available from Amazon and Maxi-Aids
Step-by-Step Threading Guide
- Assemble the Threader: Connect the red threading unit to the white base by sliding it between the two tracks until it stops.
- Examine the Mechanism: Gently press the square pedal to reveal the thin metal “foot” that pushes the thread.
- Insert the Needle: Place the spool of thread on the holder. Insert the needle into the funnel, sharp end up. If the needle is secure, you won’t be able to lift it; if you can, rotate it slightly and try again.
- Drape the Thread: Drape a few inches of thread across the small groove located between the funnel and the thread cutter.
- Press and Pull: Press down on the pedal. The metal foot will push a small loop of thread through the needle’s eye. Pinch the metal foot and the thread loop together and pull them away from the unit.
- Secure and Release: Release the pedal, pull the thread until it’s free, and then lift the needle out of the funnel, holding it by the eye.
- Cut and Knot: Pull approximately 18 inches of thread (from your fingertips to your elbow), cut it with the built-in cutter, and tie your knot.
Threading with a Wire Loop Threader
A wire loop threader is a small metal handle with a thin wire loop. You push the loop through the needle’s eye, feed the thread through the loop, and pull it back to thread the needle. These threaders are inexpensive and work with a wide range of hand and machine needles. They are not very durable and require good dexterity.
 wire loop threader available on Amazon
Step-by-Step Threading Guide
- Prepare Your Materials: Gather a wire loop threader, needle, thread, pincushion, and a stabilizer (like a cork or soap).
- Stabilize the Needle: Push the sharp end of the needle into a bar of soap or cork.
- Locate the Eye: Grasp the top of the needle between your thumb and index finger to feel the small bulges that guide you to the eye.
- Insert the Wire Loop: With your fingers holding the needle’s top, use your other hand to slide the wire loop into the space between your thumb and finger. The loop will now hang from the eye of the needle.
- Feed the Thread: Pull about 18 inches of thread from the spool and wind the end around a straight pin or match head. Pass the pin or match head through the hanging wire loop to pull the thread through.
- Remove the Wire: Unwind the thread from the pin. Keep your finger lightly on the top of the needle and grasp the metal handle of the wire loop. Pull the wire loop completely back out of the needle.
- Finish Up: The thread is now pulled through the needle’s eye. Cut the thread from the spool and tie a knot to finish.
Embroidery and Needlepoint
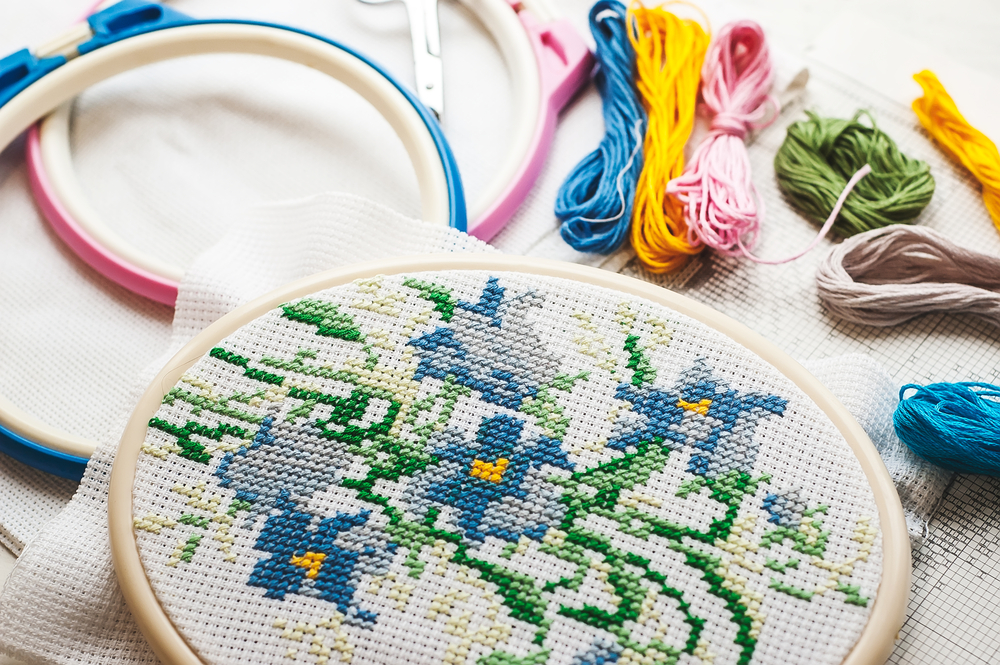
If you are picking up embroidery or needlepoint again after vision loss, give yourself time to practice and learn to use feedback from your sense of touch. Start with simpler items and move on to more challenging projects as your confidence grows.
- Access Your Patterns: You can enlarge instructions or patterns using a photocopier, computer software, or using magnification on a smartphone or tablet. You can also record instructions using a digital voice recorder or a smartphone app.
- Use a Needlework Hoop: A needlework hoop keeps your work contained. A stand-mounted hoop frees your hands, allowing you to check your work with a magnifier.
- Try Freeform Hand Work: To keep freeform embroidery stitches uniform, use smaller-sized hoops and move the hoop along as you work.
- Find Accessible Kits: Look for commercial embroidery kits with larger patterns and canvas sizes.
Quilting
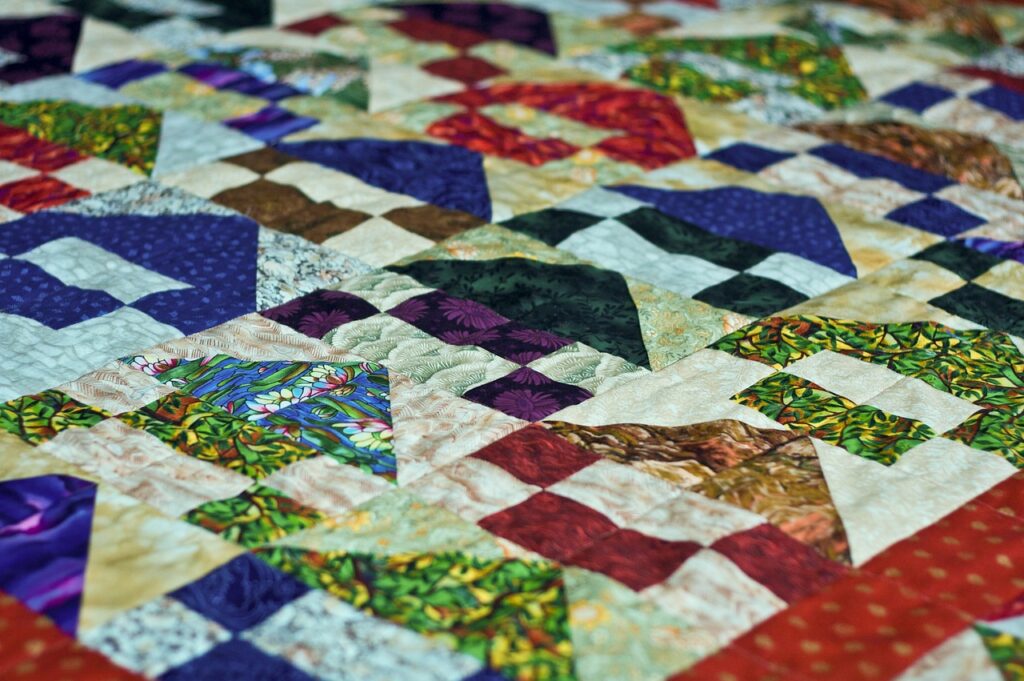
A quilt is essentially a fabric sandwich: a top design, a middle layer of batting, and a back fabric, all held together by stitches. As a quilter with low vision or blindness, you can create beautiful quilts by focusing on tactile and organizational techniques.
- Create Cutting Templates: Make a cutting template from a firm material like plastic or colored foam. Use solid, bright colors for contrast. If you have low vision, place contrasting tape along the edges to make it easier to see.
- Choose the Right Needle: Quilting needles are very thin and short with extremely small eyes. “Betweens” or embroidery needles are longer, have larger eyes, and can also be used for quilting. Experts may prefer smaller needles for finer stitches, but be sure you are comfortable with whatever size needle you use.
- Use Tactile Guides for Straight Lines: To help maintain a straight sewing line, use ¼-inch tape or make a line of quilting pins. Quilting pins are longer than regular pins and have large, round heads that make them easier to feel and locate. This tactile pin line can guide your sewing and can easily be moved along as you work. Safety pins may also be easier to use for holding your project together.
- Focus on Even Stitches: The ultimate goal for quilters is small, even stitches, with 16-20 stitches per inch. As a new quilter who is blind or has low vision, just focus on keeping your stitches even—smaller stitches will come with practice and experience.
- Sign Your Work: You can sign your quilt by using an adapted signature guide.
Quilt Care
Protect the quilts you create by following a few simple care guidelines.
- Prevent Sun Damage: Avoid exposing your quilts to direct sunlight for more than a few hours, as this can cause acid in the fabric to rise to the surface, creating brown spots. Gently washing the quilt will often remove the spots for another several years.
- Manage Dust: Dust particles have sharp edges that can cut the threads in the fabric over time. To “dust” a quilt, cover a vacuum nozzle with fabric and gently vacuum the entire piece.
- Store Correctly: Avoid storing quilts in plastic coverings for long periods. Acid-free paper and boxes are the recommended storage method. Also, wooden chests or boxes are not recommended because oils from the wood can bleed into the fabric and cause permanent staining.
- Wash with Care: If you need to wash a quilt, use a gentle or soak/rinse cycle with cold water. Do not use the spin cycle, which can damage a fragile quilt. Gently press out excess water with your hands, but do not twist or wring the fabric. Dry cleaning is not recommended for quilts because it is a chemical process.
- Dry Your Quilt: The best way to dry a quilt is to lay it flat on the grass on top of a sheet and in the shade. Do not hang the quilt on a clothesline because the weight can break the stitches.
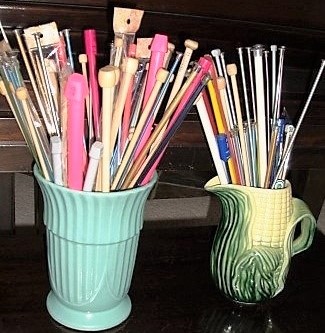
Knitting
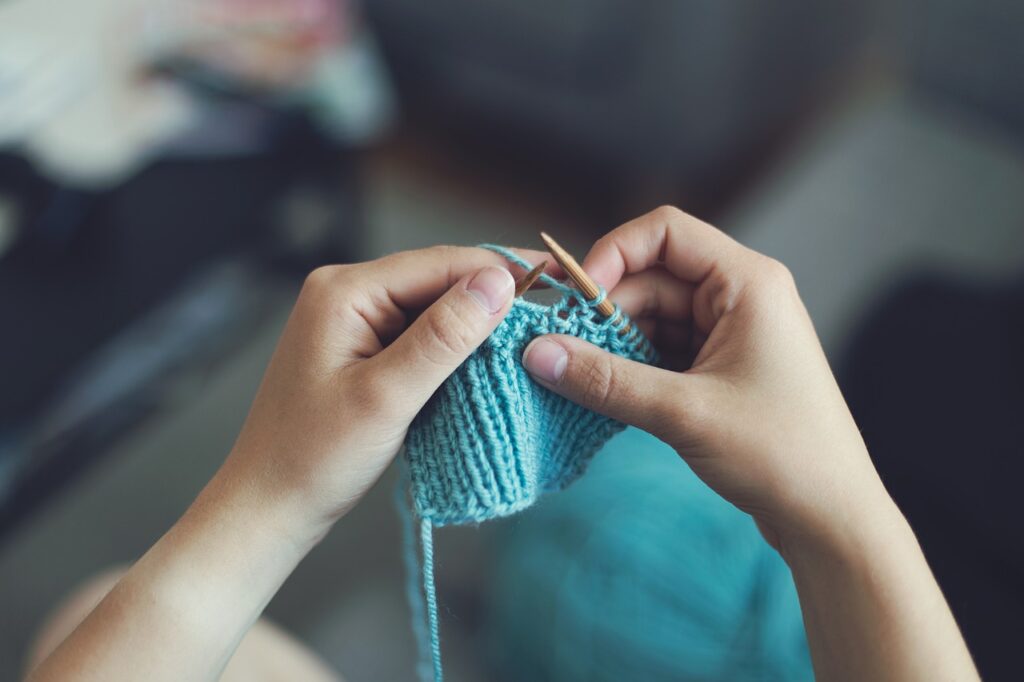
Do you have happy memories of knitting with two needles in your hands and the feeling of a soft ball of yarn in a color that you love? If you have, you can absolutely pick up the hobby again with patience and adaptive techniques. You can create beautiful things to wear or donate, or simply enjoy the comfort and warmth of the yarn in your hands. For one knitter who is blind, the hobby was a “game changer”. It was a way for her to successfully take on a challenge, gain self-confidence, and take pride in what she could do.
- Create a Knitting Nook: First, select a quiet, relaxing space in your home where you won’t have interruptions. You will need a place where you can concentrate on your knitting. Your “knitting nook” can be a spare room or a small corner. Use baskets, shelving, or drawers for storage. You can also use nesting TV tables or a card table. You can place a small table beside your chair or couch for a lamp if you need extra light.
- Select Your Pattern: Decide what you want to knit, but be realistic. Start with a simple pattern, like a scarf or a dishcloth, as they are straightforward and require you to knit in a straight line. Choose a pattern listed as “easy” or “for a beginner” to set yourself up for success.
- Gather Your Equipment: Use small embroidery scissors, which are easy to carry and store. You can purchase a tape measure designed for blind crafters that has both large print markings and grommets to mark the inches. Use a digital recorder to record each line of your pattern. This allows you to listen to one line of instructions at a time as you knit. Avoid slick metal needles, as bamboo or plastic needles are often easier to use because they provide a better grip on your stitches.
- Choose the Right Yarn: Select a thicker, worsted-weight yarn that you will be able to feel easily because it requires larger needles. A simple worsted-weight yarn in wool or acrylic would be perfect for you to begin using. Smooth yarn is much easier to control than fancy, delicate, or nubby yarns. Boucle yarns are also difficult to feel and can tangle into a mess. Be sure to buy all of the yarn at one time and check that the dye lots are the same to avoid a color shift in your project.
- Use Your Sense of Touch: Think of your fingers as your eyes. Instead of trying to look at your work, you will begin “looking with your touch”. Concentrate on how each hand feels as you work. Go slow and take your time. You’ll learn to feel each stitch and can count them as you go. Keep your fingers close to the needle tips to stay in control.
Conclusion
With these accessible tips and techniques, you can confidently tackle your next sewing, quilting, or knitting project. Whether you are using a self-threading needle, a “Witch” threader, or a simple wire loop, you now have the tools and knowledge to manage your supplies and enjoy the rewarding experience of hand-sewing. This guide, along with other helpful organizations like Mitsy Kit and Horizons for the Blind, is a reminder that with patience and a focus on your other senses, you can continue creating beautiful, rewarding pieces with your own hands.
Learn More
• Mitsy Kit: This company offers a patented tactile sewing system with kits and tutorials for various projects, including pillows, tote bags, wall hangings, and quilts. Kits include all necessary components and come with instructions available in print, as text files, and with YouTube tutorials. The company also has a YouTube channel with adaptive sewing and crafting tutorials. All profits are given to charity with a primary focus on blind and disabled communities.
• Horizons for the Blind: This organization provides a variety of information and services for people who are blind or visually impaired, including free publications in braille, large print, and audio. They offer free access to information and entertainment, including books on crafts and hobbies.