Skincare and Makeup for Blind Individuals
Caring for your skin and applying makeup can be empowering ways to express yourself and boost confidence. With clear techniques, tactile strategies, and adaptive tools, people who are blind or low vision can enjoy a beauty routine safely, independently, and with precision.
Cleansing and Moisturizing
- First, wash your face with warm water and mild soap or with a facial cleanser. Be sure to rinse thoroughly to remove any soap or cleanser residue.
- Next, apply a light cream or moisturizer. Be sure the moisturizer is fully absorbed before you begin your makeup application.
- When applying cleansing cream and/or moisturizer, try to follow the following sequence, using both hands:
- Upward and outward from chin to ears
- Across and up from nose to temples
- Upward from the tip of the nose to forehead
- Circular motions on the forehead to temples
- Gently over eyelids from the inner corner to the outer corner
- Gently under eyes from the outer corner to the inner corner
- Small circular motions around the sides of the nose
- Circular motions on the chin
- Upward on throat
Applying Foundation

- Like most makeup, foundation looks best when applied sparingly and lightly. Don’t hesitate to ask for assistance or confirmation from a family member or friend.
- Foundation is available in several types: liquid (including tinted moisturizer), cream, cream-to-powder, and stick. The formulation you select depends upon your skin type and the amount of coverage you desire.
- Choose a foundation color that is as close as possible to your own skin color. If you’re unsure about the correct shade, ask a family member, friend, or cosmetician for assistance.
- You can also get professionally color-matched at a department store or by contacting a representative from a cosmetic company, such as Avon or Mary Kay.
- In general, the foundation color should match your skin and disappear when blended well. It’s best to avoid shades that are darker than your natural skin color.
Be sure to clean your hands and fingertips before going on to the next step to prevent makeup residue from rubbing off on your face, clothing, and upholstery.
Applying Liquid Foundation or Tinted Moisturizer
Liquid foundation or tinted moisturizer is suitable for a variety of skin types and is available in water-based (lighter coverage; for normal to oily skin) and oil-based (heavier coverage; for dry skin) formulations.
- Shake the container well to mix the formula. Apply a dime-sized drop to your makeup sponge or pour it into the palm of your hand. Apply a dot on each cheek, the nose, the chin, and the forehead.
- To blend, follow the same sequence as in applying moisturizer. Use both hands and be sure to avoid your eye area:
- Upward and outward from chin to ears
- Across and up from nose to temples
- Upward from tip of nose to forehead
- Circular motions on forehead to temples
- Small circular motions around sides of nose
- Circular motions on chin
- Upward on throat
- Blend carefully at your jaw line and throat, paying special attention to areas where foundation tends to collect, such as the hairline, the sides of the nose, the area in front of the ears, and the chin.
- Wipe a tissue over your eyebrows and along your hairline and thoroughly clean both hands before continuing, because foundation can stain your clothing and upholstery.
- Allow it to “set” for 5-10 minutes before continuing with your makeup routine.
Applying Cream Foundation
Cream foundation is suitable for a variety of skin types, but is most appropriate for dry skin. It offers heavier coverage than liquid foundation and is available in several formulations, including regular cream and cream-to-powder, also called dual-finish.
- Applying cream foundation with a damp makeup sponge gives the most control. Stroke the sponge 1-2 times across the surface of the cream or the cream-to-powder compact. Use a light touch, because a little goes a long way.
- Touch the sponge once on each cheek, the nose, the chin, and the forehead.
- To blend, follow the same sequence as in applying moisturizer. Use both hands (instead of the sponge) and be sure to avoid your eye area:
- Upward and outward from chin to ears
- Across and up from nose to temples
- Upward from tip of nose to forehead
- Circular motions on forehead to temples
- Small circular motions around sides of nose
- Circular motions on chin
- Upward on throat
- Blend carefully at your jaw line and throat, paying special attention to areas where foundation tends to collect, such as the hairline, the sides of the nose, the area in front of the ears, and the chin.
- Wipe a tissue over your eyebrows and along your hairline and thoroughly clean both hands before continuing, because foundation can stain your clothing and upholstery.
- Allow your foundation to “set” for 5-10 minutes before continuing with your makeup routine.
Applying Stick Foundation
Stick foundation provides full coverage, a matte finish, and is best suited for oily skin. It also provides good coverage for blemishes, discolorations, and scars. Here is how to apply it:
- Roll up or twist up the foundation tube and check with one finger to make sure the tip appears slightly above the container level.
- Place the tip directly below the center of your cheekbone and stroke it lightly upward and outward toward your ear. Repeat this motion on the other cheek. Next, apply one short stroke to the nose, the chin, and the forehead.
- To blend, follow the same sequence as in applying moisturizer. Use both hands and be sure to avoid your eye area:
- Upward and outward from chin to ears
- Across and up from nose to temples
- Upward from tip of nose to forehead
- Circular motions on forehead to temples
- Small circular motions around sides of nose
- Circular motions on chin
- Upward on throat
- Blend carefully at your jaw line and throat, paying special attention to areas where foundation tends to collect, such as the hairline, the sides of the nose, the area in front of the ears, and the chin.
- Wipe a tissue over your eyebrows and along your hairline and thoroughly clean both hands before continuing, because foundation can stain your clothing and upholstery.
- Allow your foundation to “set” for 5-10 minutes before continuing with your makeup routine.
Applying Blush and Powder
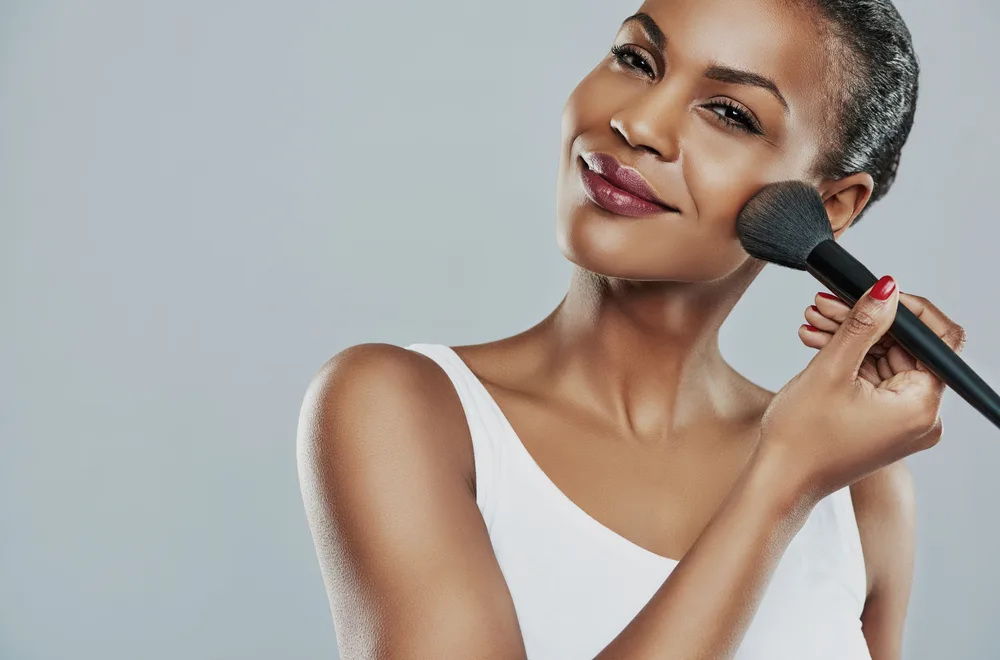
Like most makeup, blush looks best when applied sparingly and with a light touch. Don’t hesitate to ask for assistance or confirmation from a family member or friend.
Blush is available in several formulations: cream, powder, and stick. Generally, powder formulations are the easiest to apply and blend, but use whichever type is most comfortable for you.
Your skin tone and hair color generally determine your choice of blush color. If you’re unsure which color to choose, ask a family member, friend, or cosmetician for assistance. You can also get professionally color-matched at a department store or by contacting a representative from a cosmetic company, such as Ulta or Sephora.
Use your fingertips to explore your cheekbones before applying blush. The area to cover extends from each cheek’s center (or “apple”) to the hairline. Your blush color should never extend below the center of your nostril.
Applying Cream Blush
- Press your fingertip once into the blush container.
- Place your fingertip at the center of your cheekbone (the “apple”) and stroke it lightly upward and outward toward your ear.
- Repeat this motion 2-3 times on each cheek. Blend the cream blush upward and outward with your fingertips (at minimum, use the index, middle, and ring fingertips) to achieve a subtle effect. Use your right hand for your right cheek and your left hand for your left cheek.
Applying Powder Blush
- Stroke the brush 2-3 times across the powder cake.
- Place the brush at the center of your cheekbone (the “apple”) and stroke it lightly upward and outward toward your ear.
- Repeat this brushing motion 3-4 times on each cheek.
- Blend the powder upward and outward with your fingertips (at minimum, use the index, middle, and ring fingertips) to achieve a subtle effect. Use your right hand for your right cheek and your left hand for your left cheek.
- Use a clean tissue to dust away any excess powder.
Applying Stick Blush
- Roll up or twist the blush stick and check with one finger to ensure the tip appears slightly above the container level.
- Place the tip at the center of your cheekbone (the “apple”) and stroke it lightly upward and outward toward your ear.
- Repeat this motion 2-3 times on each cheek.
- Blend the blushing cream upward and outward with your fingertips (at minimum, use the index, middle, and ring fingertips) to achieve a subtle effect. Use your right hand for your right cheek and your left hand for your left cheek.
Applying Powder
If you like to use face powder to finish or “set” your foundation, a colorless or translucent powder is best. Here is a technique for applying it:
- Stroke the powder puff or applicator 2-3 times across the surface of the powder compact.
- Touch the puff or applicator once on each cheek, the nose, the chin, and the forehead.
- Blend with the puff or applicator, following the same sequence as in applying moisturizer:
- Upward and outward from chin to ears
- Across and up from nose to temples
- Upward from the tip of the nose to the forehead
- Circular motions on the forehead to temples
- Small circular motions around the sides of the nose
- Circular motions on the chin
- Upward on throat
- Use a tissue or eyebrow brush to remove any excess foundation or powder.
- Trace your eyebrow with your index finger, starting at the inner corner, to help determine the arch’s size, shape, and location and to feel for any stray hairs.
- Retrace your eyebrow, using the index and middle fingers together.
- Note: Most right-handed people find it more challenging to apply makeup to the left eye, while left-handed people struggle with the right eye.
Applying Eyebrow Pencil
- Choose a neutral color or shade close to your eyebrow or hair color.
- Keep the point sharpened, and hold it as close to the point as possible for better control.
- Make small, short strokes, starting at the inner corner. Use the opposite hand’s index finger to trace the eyebrow and guide the point.
- Use an eyebrow brush to blend and soften the color.
Applying Eyebrow Powder
- Choose a neutral color or shade close to your eyebrow or hair color.
- Practice with a clean applicator first to help you feel the natural shape of your eyebrows.
- Stroke the applicator once across the powder cake.
- Hold the applicator as close to the tip as possible for better control.
- Make small, short strokes, starting at the inner corner. Use the index finger of your opposite hand to trace the eyebrow and guide the applicator.
- Repeat with the other eye.
An alternative technique:
- For the right eye, stroke the tip of your right middle finger across the powder cake.
- Beginning close to your nose, trace your right eyebrow with the tip of your right index finger and follow with the tip of your right middle finger. Trace along your entire eyebrow from your nose outward to your temple.
- Repeat the same pattern with your left eyebrow, tracing it with your left index finger and following with the tip of your left middle finger. Trace across your eyebrow from your nose outward to your temple.
- After applying, clean your finger thoroughly with a damp cloth or facial tissue.
To Shape Your Eyebrows
- Use a magnifying mirror and tweezers.
- Have your brows waxed professionally.
- Groom your brows daily with an eyebrow brush or comb.
Eye Shadow Tips and Preparation
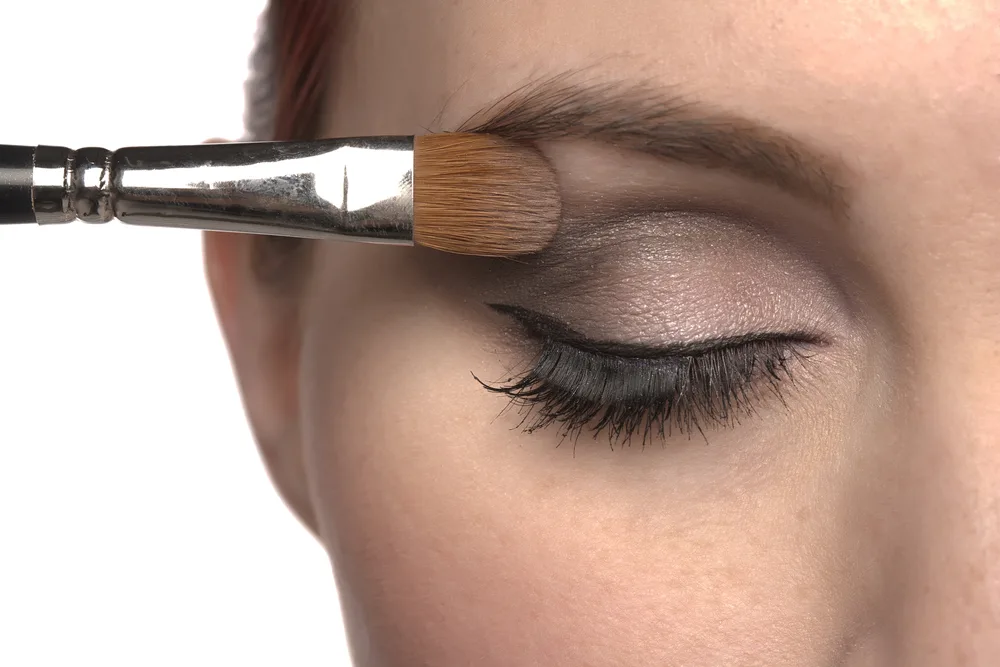
- Applicators (a sponge tip or an eye shadow brush) should be held as close to the tip as possible to provide feedback during application.
- Practice with a clean applicator first to better feel the natural shape of your eyelids.
- You can also use your fingertip instead of an applicator.
- Powder shadows can be blended and softened more easily than cream shadows, but use whichever type is most comfortable for you.
- Be sure to close your eyes when applying shadow to your eyelids.
Applying Eye Shadow
- Stroke the applicator (or your fingertip) 3-4 times across the eye shadow cake.
For your right eye:
- Place the index finger of your left hand at the inside corner of your right eyelid to provide a starting point.
- With your right hand, place the applicator tip (or your right fingertip) next to your index finger/starting point and move it across your eyelid to the outer corner, just above the eyelashes.
- Repeat the stroke pattern, slightly higher across the lid and overlapping the prior stroke.
- Follow the same stroke pattern until your lid is covered up to the crease.
- Blend the eye shadow gently with your fingertip to achieve a subtle effect.
For your left eye:
- Place the index finger of your right hand at the inside corner of your left eyelid to provide a starting point.
- With your left hand, place the applicator tip (or your left fingertip) next to your index finger/starting point and move it across your eyelid to the outer corner, just above the eyelashes.
- Repeat the stroke pattern, slightly higher across the lid and overlapping the prior stroke.
- Follow the same stroke pattern until your lid is covered up to the crease.
- Blend the eye shadow gently with your fingertip to achieve a subtle effect.
Applying Eye Liner/Eye Pencil
- Eye pencils can offer an alternative to liquid eyeliner.
- Holding the pencil close to the point, draw a line from the middle of your eyelid to the outside corner of your eye at the base of the lash line.
- Soften the line by smudging it gently with your index finger. Use your right hand for your right eyelid and your left hand for your left eyelid.
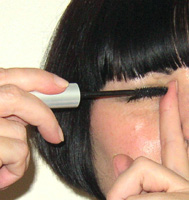
Mascara Tips and Preparation
- Always consult with your ophthalmologist or optometrist before attempting to apply mascara.
- Dyeing your eyelashes at a professional salon can offer an alternative to mascara application. Again, consult your ophthalmologist or optometrist before attempting this procedure.
- Practice with a clean mascara wand first to get a “feel” for the technique.
- Always brush or scrape the head of the wand against the opening of the tube to remove clumps and excess mascara.
- After three months, a tube of opened mascara should be discarded to prevent eye infections from bacteria buildup.
Applying Mascara
- Before you attempt this application technique, ask a family member or friend to watch you to ensure you’re doing it correctly.
- To begin, close your eyes.
- For your right eye, place the index finger of your left hand vertically against the right side of your nose, with the tip of your index finger positioned by the inside corner of your eye and the finger pad facing to the right. This will provide a stabilization point for the mascara wand. Stabilizing the brush against your finger prevents you from accidentally poking yourself in the eye with the mascara wand.
 Hold the mascara wand horizontally, resting the point or tip against the pad of your index finger. Holding the wand in this position will help with cleanup since the excess mascara will be deposited on your fingertip instead of on the side or bridge of your nose.
- Bat or flick your eyelashes against the wand 3-4 times. This will deposit mascara on the underside of your upper lashes.
- Angle the wand slightly upward to catch the outer lashes. Again, bat or flick your eyelashes against the wand 3-4 times.
- For your left eye, repeat the procedure, reversing directions.
- Perform this technique on your upper eyelids only.
- When you finish, wipe your fingertips and the area on either side of the bridge of your nose (to make sure it’s clean) with a damp cloth or tissue to remove any excess mascara.
Applying Lipstick
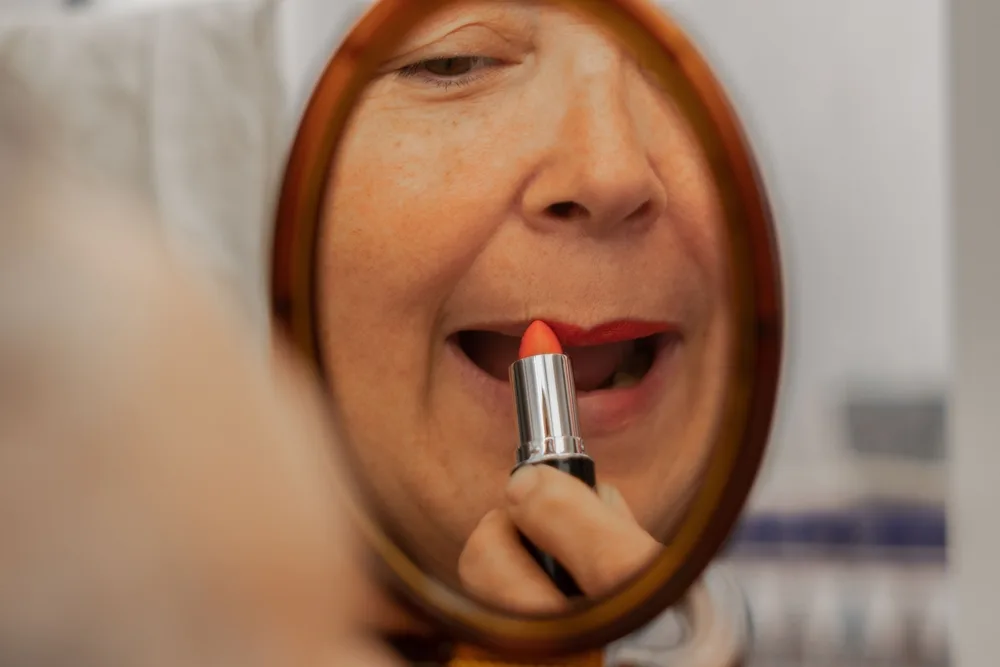
- To make lipstick last longer, blot foundation on your lips before applying.
- Slim-line lipsticks are generally easier to use than thicker ones.
- Lip gloss can be applied with the finger (usually the pinky). You can also use a clear or lightly tinted lip gloss in place of lipstick.
- If you use lip liner, hold it as close to the point as possible for better control. Use a nude or neutral shade for best results.
- Roll up or twist up the lipstick and check with one finger to make sure the tip appears slightly above the container level.
- Trace the shape of your lips with your index finger.
- Part your lips slightly.
- Apply lipstick as follows:
- From the center of your upper lip to the right corner of your mouth, decreasing pressure as you get closer to the corner, since the corner area is much smaller;
- From the center of your upper lip to the left corner of your mouth, again decreasing pressure at the corner;
- From the center of your bottom lip to the right corner of your mouth;
- From center of your bottom lip to the left corner of your mouth.
- For your lower lip, you can also begin at one corner and move across the lip to the other corner, making a return stroke to fill in the lower lip.
An Alternative Technique
- From the right corner of your mouth to the center of your upper lip;
- From the left corner of your mouth to the center of your upper lip;
- From the center of your bottom lip to the right corner of your mouth;
- From center of your bottom lip to the left corner of your mouth.
- Close your lips and rub your top and bottom lips together several times.
- Blot with a tissue to remove excess lipstick.
With the use of tactile markers, consistent positioning, and adaptive tools, skincare and makeup routines can become safe, enjoyable, and empowering daily practices.